Blender Add-On Tutorials
An introduction on how to use the RapidPipeline Processor Blender Add-On.
For installation instructions please refer to the reference documentation for installation.
Basic Usage
- Open a model in Blender.
- In the 3D Viewport open the Sidebar (default hotkey
n) and chooseRapidPipeline. - Select the mesh or meshes to be processed.
- Adjust the RapidPipeline settings as desired.
- Click the Run button.
- The selected meshes are processed.
- The source mesh is hidden and a new Collection is created for the results
Usage Guides
Guide 1: Mesh Decimation with RapidPipeline
- Load a Blender scene and open RapidPipeline Processor.
- Navigate to the
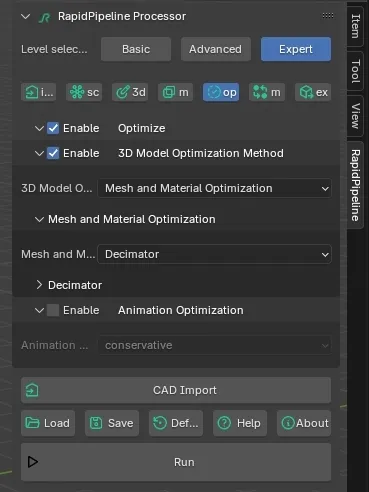
Optimizetab. - Select
EnabledandOptimization Method. - Under
Mesh and Material OptimizationchooseDecimator. - Under
Targetyou can adjust the parameter of the decimation. - Select the Objects in the scene that should be decimated and click on
Run.
Guide 2: Remeshing with RapidPipeline
- Load a Blender scene and open RapidPipeline Processor.
- Navigate to the
Optimizetab. - Select
EnabledandOptimization Method. - Under
Mesh and Material OptimizationchooseRemesher. - Under
Material Mergerthere are additional Material related settings. - Under
Targetyou can adjust the parameter of the remeshing operation. - Select the Objects in the scene that should be decimated and click on
Run.
Guide 3: Save Processor preset
- Load a Blender scene and open RapidPipeline Processor.
- Adjust any desired settings.
- Press
Savebutton and choose a location to save the selected settings as a.jsonfile on disc.
Guide 4: Load Processor preset
- Load a Blender scene and open RapidPipeline Processor.
- Press
Loadbutton and choose the location of previously saved Processor settings. When loading new settings, all prior changed settings will be overwritten.
caution
Loaded settings must be in RapidPipeline Processor 7.x format. The Add-On will not load older 6.x presets, which if present in your web account will show the tag "Legacy":
![]()