Tutorial: Remesher in Blender
| This tutorial contains these key points: |
|---|
| ✔️ Use the Blender Add-On |
| ✔️ Create a Settings Preset Config |
| ✔️ Remesh selected parts |
| ✔️ Decimate the remaining parts |
| ✔️ Export a GLB |
| ✔️ Compare the results |
This tutorial shows how use the RapidPipeline Processor Add-On in Blender to simplify a 3D model, optimizing parts with small holes using the Remesher, baking the holes into an alpha map, and decimating the rest of the model.
This tutorial makes use of the RapidPipeline Processor Add-On for Blender, for more information see the Blender Add-On Documentation. The Add-On runs on a powerful 3D data optimization and automation toolset, for more about this see the 3D Processor Reference.
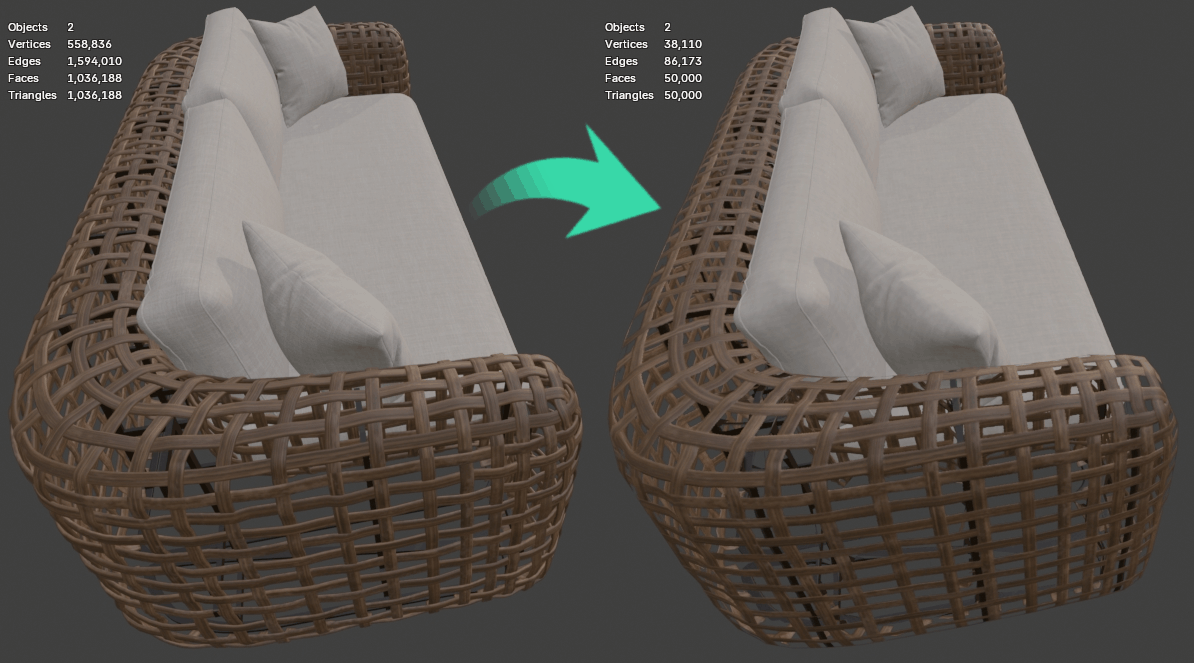
Input model (left) has been remeshed, and textures were baked including an alpha map for the holes. Source model is 55mb with 1,036,188 triangles, and the optimized model is 4.8mb with 50,000 triangles.
This tutorial uses a high-resolution wicker sofa model available free here from Sketchfab. Credits: "wicker sofa" (https://skfb.ly/prBJM) by M I H is licensed under Creative Commons Attribution (http://creativecommons.org/licenses/by/4.0/).
Using the Remesher
First step is to complete the installation process to make sure the RapidPipeline Processor Add-On is installed and ready to use.
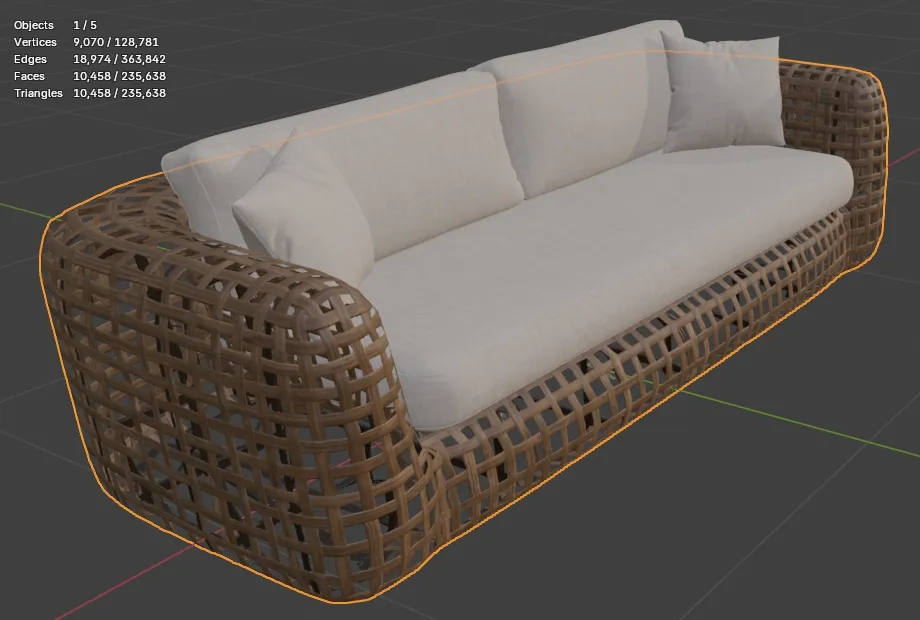
The remeshing will be done first, so select the wicker by clicking on it in the Main Window.

Turn on
Statisticsin the Blender viewport.

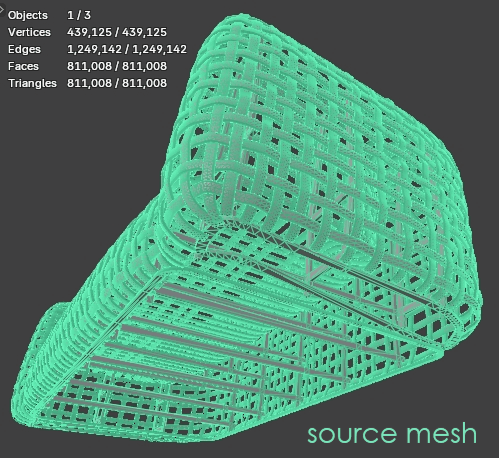
In the top left corner of the viewport, notice that the total triangle count is 1,036,188.

- The desired total for the optimized model is 50,000 triangles. At that resolution the model will be fairly compact but still retain significant detail from the original.
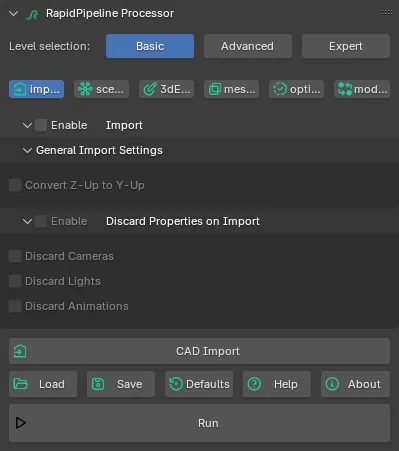
In the 3D Viewport open the Sidebar (default hotkey
n) and chooseRapidPipeline.
In the Optimize tab, turn on
Enabled. This turns on decimation and remeshing.

Enable the 3D Model Optimization Method and set it to use
Mesh and Material Optimization.

- Materials can be optimized alone, but in this case both the meshes and the materials need to be changed because the Remesher creates a whole new mesh and bakes textures from the source meshes onto the new mesh.
Set the Mesh and Material Optimization to
Remesher.

Set the Remeshing Method to
Shrinkwrap.

- The two remeshing methods Shrinkwrap and Voxelization produce different results, which can be leveraged in different situations.
- Shrinkwrap is generally better with mechanical shapes and hard angles, while Voxelization is better with organic meshes like clothing and characters.
- In the Target secton set the Faces to
Faces Valueand type in25000.
- The desired final triangle count for the entire sofa will be 50,000. The wicker can be limited to half of that, which ensures there will be enough resolution left for other half (fabric cushions).
The Remesher Target is an upper limit. If the Remesher needs less triangles it will do this automatically, but it will never exceed this limit.
- In the Material Merger section, set the Material Regenerator to
Generate UV Atlas.
- The remesher will create a totally new mesh, and transfer the materials over from the source meshes. This setting tells RapidPipeline Processor to create UVs for this new mesh.
- Make sure the Normal Map Baking Mode is set to
always.
- This will bake a bump map to preserve the bevels and details from the source model.
- Next to Ambient Occlusion Map Baker, turn on
Enable.
- This will bake an ambient occlusion map for the new mesh, which also helps to preserve shading detail from the source meshes.
- Enable the Texture Baking Resolution, and set the Default Texture Map Resolution to
4096.
- The original textures are 2k, but since we are replacing the detailed wicker mesh with an alpha texture, we want to make sure we have enough pixels for smooth edges. If this resolution isn't good enough, the RapidPipeline Processor can simply be re-run with a higher resolution.
The next setting Bake Topological Holes to Alpha Map is an advanced setting which is hidden by default. To expose this setting, go to the top of the UI and set the Settings Level to
Expert. This exposes all available settings.

Scroll down to the Texture Baker section and enable the checkbox for Bake Topological Holes to Alpha Map.

- This will preserve the holes from the source meshes, by baking them into an alpha map for the new mesh, which is created by the Remesher.
- Scroll to the top of the Remesher section, set the Resolution to
6.
- The Resolution usually needs to be fine-tuned to match the size of the holes in the source topology. It decides how fine the remesh grid will be, which affects whether the new mesh will cover or poke through the existing holes. The greater the Resolution, the sharper the corners will be, but also the more likely the new mesh will start to sink into the holes.
A demonstration of Shrinkwrap resolution values for the wicker part of the sofa.
The upper resolutions for the Remesher are constrained by the Remesher Target value of 25,000 faces, which was set earlier. If higher resolutions are desired the Remesher Target can be adjusted, or it can disabled entirely. This can be useful for detailed meshes which may require deep cuts to be preserved.
- For this model the holes are covered completely by Resolution 6. A value of 5 also works, but the underside of the sofa starts to distort. 6 offers enough resolution to keep details, while also covering the original holes. This allows the alpha map to do the heavy lifting, and requires a lot less vertices.
- The remaining settings can be left to their defaults. Click the
Runbutton to process the model.
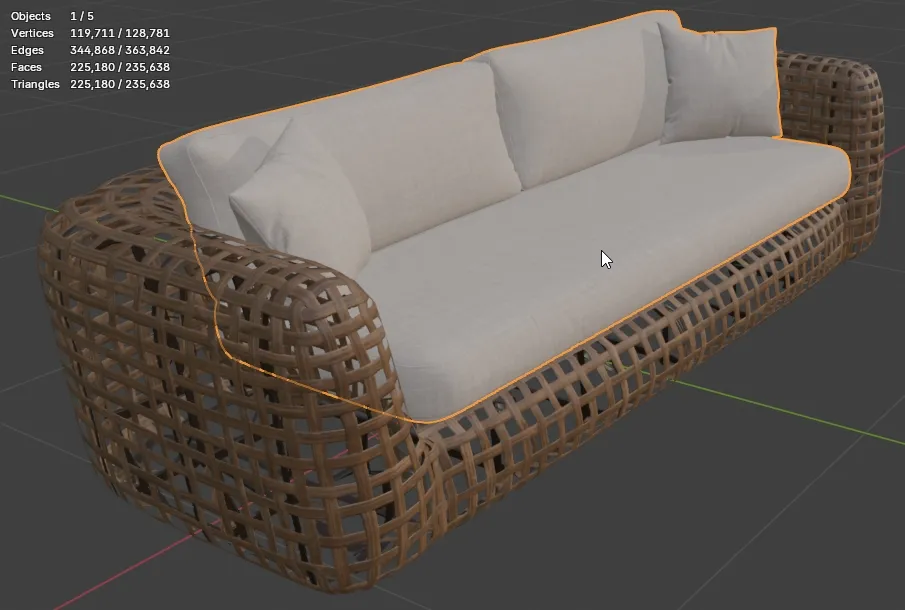
- RapidPipeline Processor optimizes the meshes quickly, and when complete the original source meshes are hidden, and the new remeshed wicker is shown.
- Notice in the Statistics that the new wicker has only 10,458 triangles, not 25,000. This is because the Remesher only needed that many to accomplish the job at Resolution 6. The Remesher Target was set to 25,000 triangles, but this is only an upper limit. This target matters more when using higher Resolution values.
The Remesher Settings File
The finished settings for the Remesher can be preserved for reuse using the Save and Load buttons. Here's what that looks like:
{
  "optimize": {
    "3dModelOptimizationMethod": {
      "meshAndMaterialOptimization": {
        "remesher": {
          "target": {
            "faces": {
              "value": 25000
            }
          },
          "materialMerger": {
            "materialRegenerator": {
              "uvAtlasGenerator": {
                "textureBaker": {
                  "normalMap": {
                    "mode": "always",
                    "recomputeNormals": true,
                    "skipNormalsRoughnessThreshold": 0.0,
                    "normalMapScale": 1.0,
                    "tangentSpace": true
                  },
                  "aoBaker": {
                    "strength": 0.5,
                    "replaceOriginal": true,
                    "filterRadius": 3.0,
                    "textureSamples": 48
                  },
                  "bakingResolution": {
                    "default": 4096
                  },
                  "dropTextures": {
                    "default": 0.0,
                    "baseColor": 0.0,
                    "opacity": 0.0,
                    "normal": 0.0,
                    "metallic": 0.0,
                    "roughness": 0.0,
                    "emissive": 0.0,
                    "occlusion": 0.0,
                    "displacement": 0.0,
                    "clearcoat": 0.0,
                    "clearcoatColor": 0.0,
                    "clearcoatRoughness": 0.0,
                    "clearcoatSpecularLevel": 0.0,
                    "clearcoatNormal": 0.0,
                    "transmission": 0.0,
                    "thickness": 0.0,
                    "attenuationColor": 0.0,
                    "scatteringColor": 0.0,
                    "scatteringDistanceScale": 0.0,
                    "sheenColor": 0.0,
                    "sheenRoughness": 0.0,
                    "sheenOpacity": 0.0,
                    "specularColor": 0.0,
                    "specularValue": 0.0,
                    "anisotropy": 0.0,
                    "anisotropyAngle": 0.0,
                    "iridescence": 0.0,
                    "iridescenceThickness": 0.0
                  },
                  "sampleCount": 4,
                  "texMapAutoScaling": true,
                  "bakeCombinedScene": false,
                  "topologicalHolesToAlpha": true,
                  "powerOfTwoResolution": "none",
                  "inpaintingRadius": 32.0
                },
                "method": "isometric",
                "segmentationCutAngle": 88.0,
                "segmentationChartAngle": 130.0,
                "maxAngleError": 114.0,
                "maxPrimitivesPerChart": 10000,
                "cutOverlappingPieces": true,
                "atlasMode": "single",
                "allowRectangularAtlases": false,
                "packingResolution": 1024,
                "packingPixelDistance": 2,
                "atlasFactor": 1
              }
            },
            "materialMergingMethod": "auto"
          },
          "method": "shrinkwrap",
          "resolution": 6,
          "filterBackProjected": false
        }
      }
    }
  }
}
Optimize the Cushions
To optimize the rest of the sofa, first select the cushions mesh.
Back in RapidPipeline Processor, go to the Optimize tab and change Mesh and Material Optimization to
Decimator.

- The cushions don't have a bunch of small holes, so traditional mesh decimation is best.
- Under the Target, set the Faces to
Faces Value, and set the Faces Value to39542.
- The desired overall triangle count is 50,000 triangles, and the wicker was remeshed to only 10,458, so this means the rest of the sofa can use the remaining 39,542 triangles.
- Set the Material Optimization to
Material Merger.
- This will make sure to merge the selected parts together into a single texture set and material, using texture baking and UV atlasing.
- Make sure the Normal Map Baking Mode is set to
always.
- This will bake a bump map to preserve the original details from the source mesh. This is especially useful if mesh creases in the fabric are being simplified down by the decimation.
Enable the Ambient Occlusion Map Baker, to bake an occlusion map.
Enable the Texture Baking Resolution, and set the Default Texture Map Resolution to
2048.

- This was the resolution used for the original cushion texture. If a smaller file size is needed, this number can simply be reduced and decimation can be re-run on the source mesh.
- The remainder of the settings can stay at their defaults. Click the
Runbutton to process the selected parts.
- RapidPipline Processor finishes optimizing the meshes quickly, and when complete the original source meshes are hidden and the decimated mesh is shown. Shift-click on the remeshed wicker to show the full Statistics.
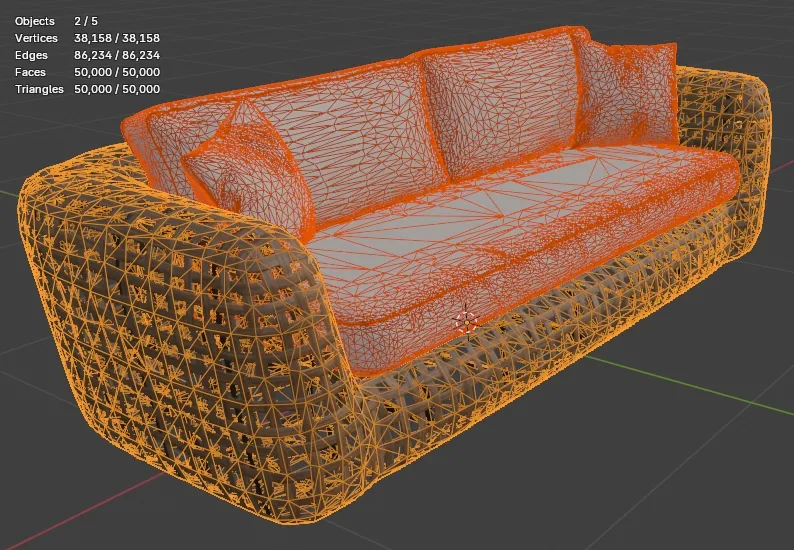
The finished result of the Remesher and the Decimator is two meshes, with a combined triangle count of 50,000.
The Decimator Settings File
The finished settings for the Decimator can be preserved for reuse using the Save and Load buttons. Here's what that looks like:
{
  "optimize": {
    "3dModelOptimizationMethod": {
      "meshAndMaterialOptimization": {
        "decimator": {
          "target": {
            "faces": {
              "value": 39542
            },
            "deviation": {
              "percentage": 0.0
            }
          },
          "materialOptimization": {
            "materialMerger": {
              "materialRegenerator": {
                "uvAtlasGenerator": {
                  "textureBaker": {
                    "normalMap": {
                      "mode": "always",
                      "recomputeNormals": true,
                      "skipNormalsRoughnessThreshold": 0.0,
                      "normalMapScale": 1.0,
                      "tangentSpace": true
                    },
                    "aoBaker": {
                      "strength": 0.5,
                      "replaceOriginal": true,
                      "filterRadius": 3.0,
                      "textureSamples": 48
                    },
                    "bakingResolution": {
                      "default": 2048
                    },
                    "dropTextures": {
                      "default": 0.0,
                      "baseColor": 0.0,
                      "opacity": 0.0,
                      "normal": 0.0,
                      "metallic": 0.0,
                      "roughness": 0.0,
                      "emissive": 0.0,
                      "occlusion": 0.0,
                      "displacement": 0.0,
                      "clearcoat": 0.0,
                      "clearcoatColor": 0.0,
                      "clearcoatRoughness": 0.0,
                      "clearcoatSpecularLevel": 0.0,
                      "clearcoatNormal": 0.0,
                      "transmission": 0.0,
                      "thickness": 0.0,
                      "attenuationColor": 0.0,
                      "scatteringColor": 0.0,
                      "scatteringDistanceScale": 0.0,
                      "sheenColor": 0.0,
                      "sheenRoughness": 0.0,
                      "sheenOpacity": 0.0,
                      "specularColor": 0.0,
                      "specularValue": 0.0,
                      "anisotropy": 0.0,
                      "anisotropyAngle": 0.0,
                      "iridescence": 0.0,
                      "iridescenceThickness": 0.0
                    },
                    "sampleCount": 4,
                    "texMapAutoScaling": true,
                    "bakeCombinedScene": false,
                    "topologicalHolesToAlpha": false,
                    "powerOfTwoResolution": "none",
                    "inpaintingRadius": 32.0
                  },
                  "method": "isometric",
                  "segmentationCutAngle": 88.0,
                  "segmentationChartAngle": 130.0,
                  "maxAngleError": 114.0,
                  "maxPrimitivesPerChart": 10000,
                  "cutOverlappingPieces": true,
                  "atlasMode": "single",
                  "allowRectangularAtlases": false,
                  "packingResolution": 1024,
                  "packingPixelDistance": 2,
                  "atlasFactor": 1
                }
              },
              "materialMergingMethod": "auto",
              "keepTiledUVs": false,
              "tilingThreshold": 1.5
            }
          },
          "preserveTopology": false,
          "preserveNormals": false,
          "preserveMeshBorders": true,
          "preserveMaterialBorders": false,
          "collapseUnconnectedVertices": true,
          "boundaryPreservationFactor": 0.5,
          "collapseDistanceThreshold": 0.004999999888241291,
          "method": "quadric"
        }
      }
    }
  },
  "export": [
    null
  ]
}
Exporting to glTF
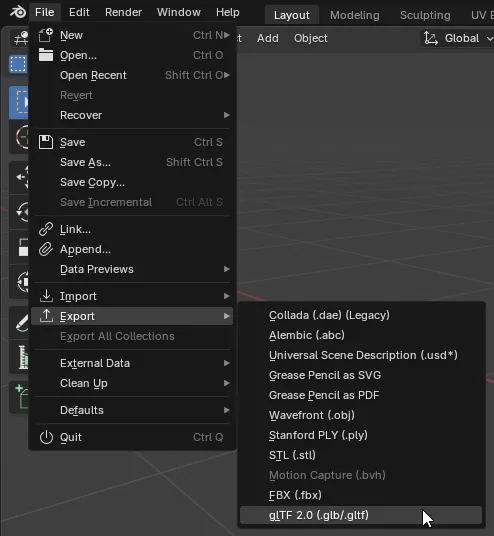
Make sure the remeshed wicker and the decimated cushions are selected, then go to the File menu, choose Export, then glTF 2.0.
In the Blender File View dialog make sure to open the Include dropdown and choose
Selected Objects.

- This will exclude the source meshes, and export only the two new optimized meshes.
- Expand the Data dropdown, then the Material dropdown, and set Images to
WebP Format.
- Textures will be compressed into WebP format, a highly optimized file format with minimal visual artifacts.
- When finished exporting, the new GLB file can be viewed in web 3D viewers like the glTF Sample Viewer. The GLB can also be uploaded to the RapidPipeline Web Platform for conversion into other formats, like USDz.
Source model is 55mb with 1,036,188 triangles, and the optimized model is 4.8mb with 50,000 triangles.
Input / Output Statistics
The source model was 55mb with 1,036,188 triangles.
The processed model is 4.8mb with 50,000 triangles!
| Input Asset | Output Asset |
|---|---|
| 1,036,188 triangles | 50,000 triangles |
| File size 55mb | File size 4.8mb |