How to Import a Preset into RapidPipeline Web
If you or someone else has created a RapidPipeline Preset, the downloaded JSON file can be shared with others and uploaded to the RapidPipeline Cloud App, or loaded into the RapidPipeline Blender Add-On.
Step 1: Create a RapidPipeline Preset
There are multiple ways to make a custom preset, depending on how you like to work:
Method 1: In the RapidPipeline Cloud App, open an existing Preset by clicking the down arrow on the left side, then change your desired settings, and click Save as new to create your own new Preset. You can rename your Preset by hovering over the name and clicking the pencil icon.


Method 2: In the RapidPipeline Cloud App, start a new empty Preset by clicking on Create Preset. This starts with nothing but the minimal Export setting. Open the new preset by clicking the down arrow on the left, then choose exactly which settings you wish to include. Make sure to click the green Save button when you're finished editing!

Method 3: Use the Blender Add-on in Expert Mode, then change your desired settings.

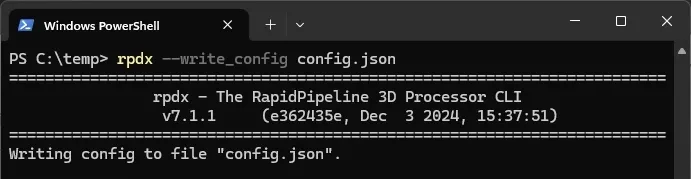
Method 4: Use the RapidPipeline CLI to generate a .JSON Preset file, then use a text editor to change your desired settings. Just make sure your edited preset is compatible with the RapidPipeline API.
Step 2: Download Your Preset
- RapidPipeline Web Platform:
- Open the RapidPipeline Cloud App.
- Click the Edit 3D Processor button.

- Change the Presets/Actions switch to Presets.

- Click the three-dots button on the right side of any Preset, and choose Download.

- After the ZIP download has finished, extract the preset.json file from the API folder.
- RapidPipeline Blender Add-On:
- Open the RapidPipeline Blender Add-On.
- Open the Settings menu, it is the button shaped like a gear.

- Enable Expert Mode and click the Back button.
- Click on Save Preset.

- Name the preset .JSON file however you prefer, and click Save JSON Preset.
Step 3: Upload Your Preset
- RapidPipeline Web Platform:
- Open the RapidPipeline Cloud App.
- Click the Edit 3D Processor button.
- Change the Presets/Actions switch to Presets.
- Click the Import Presets button, located at the top-right above the presets table.

- Click the Select button to choose your preset .JSON file, or simply drag and drop the file.

- Rename the preset if you like.
- Press the Import Presets button.
- The newly-imported preset will appear at the top of your presets list.
- Review the settings to ensure everything matches your expectations.
- RapidPipeline Blender Add-On:
- Open the RapidPipeline Blender Add-On.
- Open the Settings menu, it is the button shaped like a gear.
- Enable Expert Mode and click the Back button.
- Click on Load Preset.

- Choose your preset .JSON file, and click Load JSON Preset.
- The newly-loaded preset will simply replace all the existing settings.
- Review the settings to ensure everything matches your expectations.
Tips for Successful Preset Import
- Ensure your preset file is compatible with the RapidPipeline API. Check the documentation for specific format requirements. (https://docs.rapidpipeline.com/docs/componentDocs/3dProcessingSchemaSettings/processor-schema-overview)
- If the import fails, review the error message provided. Common issues include invalid JSON files or unsupported configurations.
- If the file you are trying to import was previously downloaded via another user's RapidPipeline Web account, make sure the file you are trying to import comes from the
/apisubfolder of the downloaded preset, instead of/cli.
With these steps, you can effortlessly import and use presets in RapidPipeline Cloud App and the RapidPipeline Blender Add-On, allowing you to share your presets with your colleagues or other people using RapidPipeline.