Getting Started
Sign Up to receive a 14-day free trial with access to all the features of both Desktop Pro + Cloud Pro plans.
Uploading your models
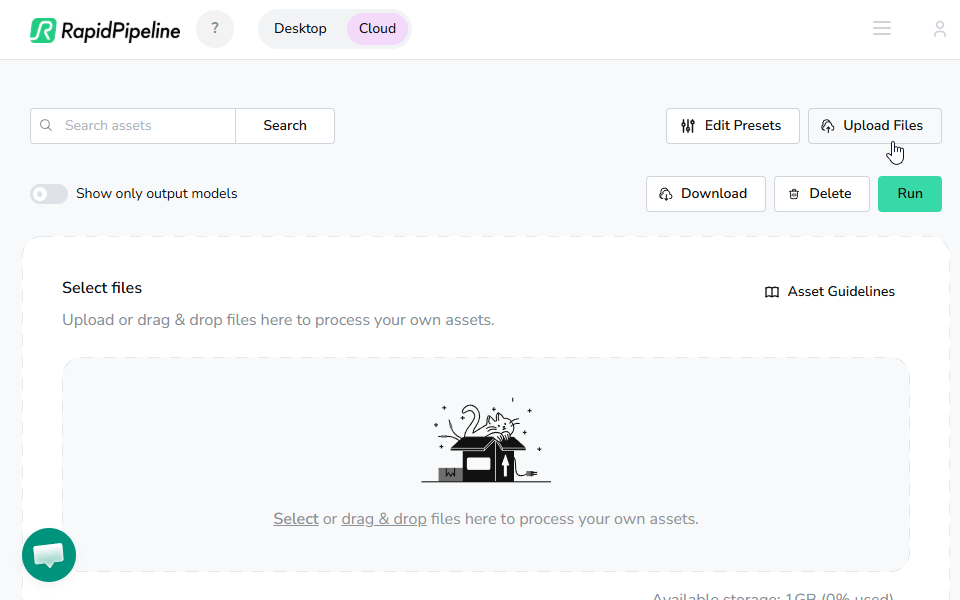
When you sign up to RapidPipeline Web Platform, upload your assets to begin your journey. You will be greeted with a drag&drop area where your assets can be uploaded.
Here are the supported import formats for RapidPipeline:
- OBJ
- PLY
- GLTF
- GLB
- FBX
- STL
- USD
- USDC
- USDA
- USDZ
- ZIP (great for including external textures!)
- VRM
- MAX
- Plus 60 CAD formats!
Auto Converted Files
RapidPipeline will automatically convert:
- CAD files are auto-converted into .glb and .usdz files.
- 3ds Max files with V-Ray materials are auto-converted into .gltf, .glb, .max, and .fbx with PBR materials... read more here!
Best Practices
These issues represent about 90% of file import failures:
- For 3D models that are not self contained, ideally you should always collect your 3D and 2D files inside a .ZIP
- Note: .RAR and other archive formats are not supported.
- When uploading .ASM files make sure to use a .ZIP to include the connected .PRT files.
- If you are uploading a .MAX scene for DCC Importer,
- Do not upload files that have long names; it's best to limit file names to 16 characters or less.
- Upload only 3dsMax 2025 or 2024 or 2023 formatted files. Newer versions are not supported at this time.
- No absolute paths
- Make sure your model does not contain absolute paths for bitmaps and other references in material descriptions.
- With absolute paths, your model will still upload but you may not see the materials or textures properly and you will see a warning related to that.
- Do not upload more than one 3D model inside a single archive.
- Even if it is the same model with different export formats (i.e. .obj and .fbx), you will get an error message while uploading it.
- Trial Plan new users have a limit of 500mb per upload.
- File size limits increase for paid plans, see your Settings page for details.
Supported formats has a detailed list of all our supported 2D and 3D formats.
3ds Max Guidelines explains how to create well-formed .MAX file imports.
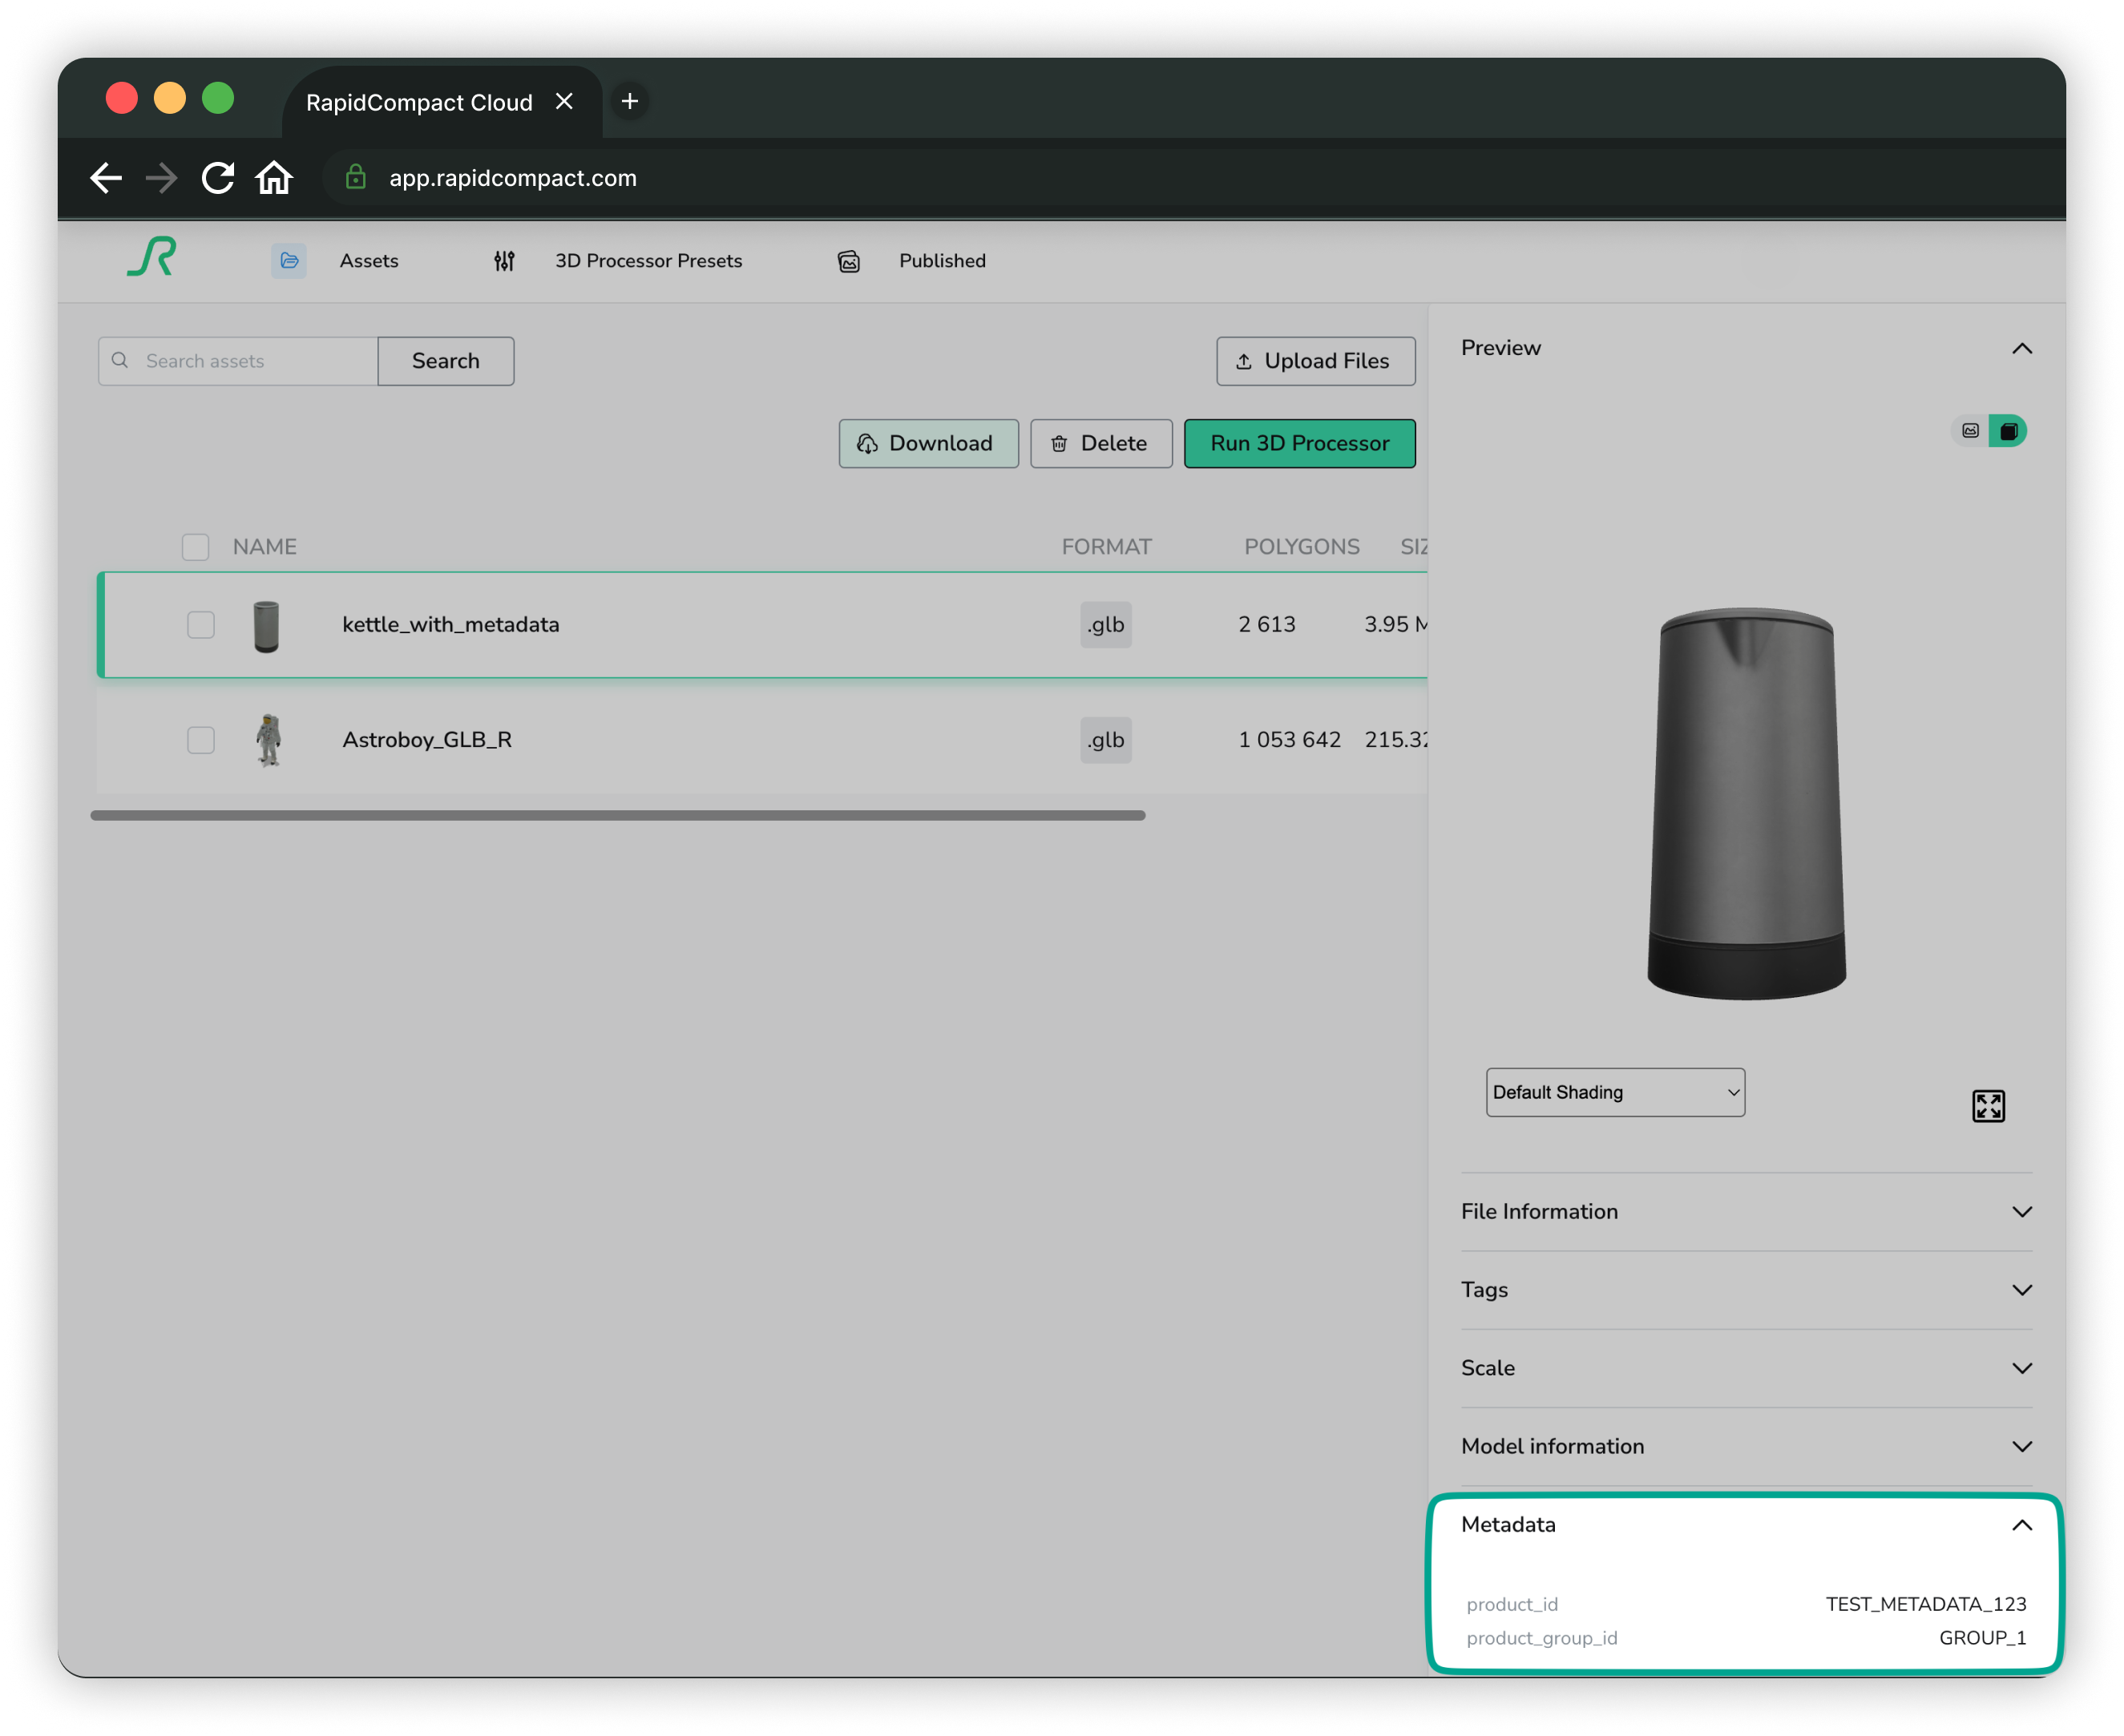
Uploading a model with Custom Metadata
To upload a model with custom metadata, you need to store this metadata in a valid JSON file, and the name of this file needs to be custom_metadata.json or any_prefix_you_prefer_custom_metadata.json, and the file needs to be in a .ZIP alongside the 3D asset.
    model.zip
    --- | model.glb
    --- | custom_metadata.json
Upload Tutorial
Once you have uploaded an asset and the system has ingested it, you will be presented with a short interactive walkthrough of the web interface.
Click on an asset to open a detailed view.
The Sidebar is where you will find your model related information. You can also resize it!
To process your models, select the models you want to process.
Click the "Lightning" or "Run" button to process them.
Presets are organized in tabs. Your custom presets will be stored in "My Presets" and they will appear at the top of "All Presets".
Feel free to click "Run 3D Processor" for any preset you want to test. You can close the popup window while the 3D Processor is running.
Congratulations! Your output model is ready. You can download individual formats by clicking on them, or click the "..." button to download them all.
After uploading your assets, the next step is to learn about 3D Processor Presets!