CLI Documentation
Installation & Set-Up
Download
In order to obtain the RapidPipeline 3D Processor CLI package for the OS of your choice, navigate to CLI page on https://app.rapidpipeline.com/cli.
In order to run the CLI, you will need an rpd_account.json file on your computer as well as an account with an Enterprise Plan on https://app.rapidpipeline.com and a valid authentication token. Start with the account file first:
Make sure to download only the CLI installers with version number 7.0 or higher = 3D Processor. For version 6.x or lower please refer to the Legacy Documentation
Account File Setup
Please download the file from here. It then can be put in a place of your choosing, we would recommend creating a “3d-processor” folder in your root directory. For example on Windows this would be:
C:\3d-processor\rpd_account.json
Windows
Here are the steps to set it up on Windows:
- Navigate to control panel / System&Security / System / Advanced System Settings / Environment Variables
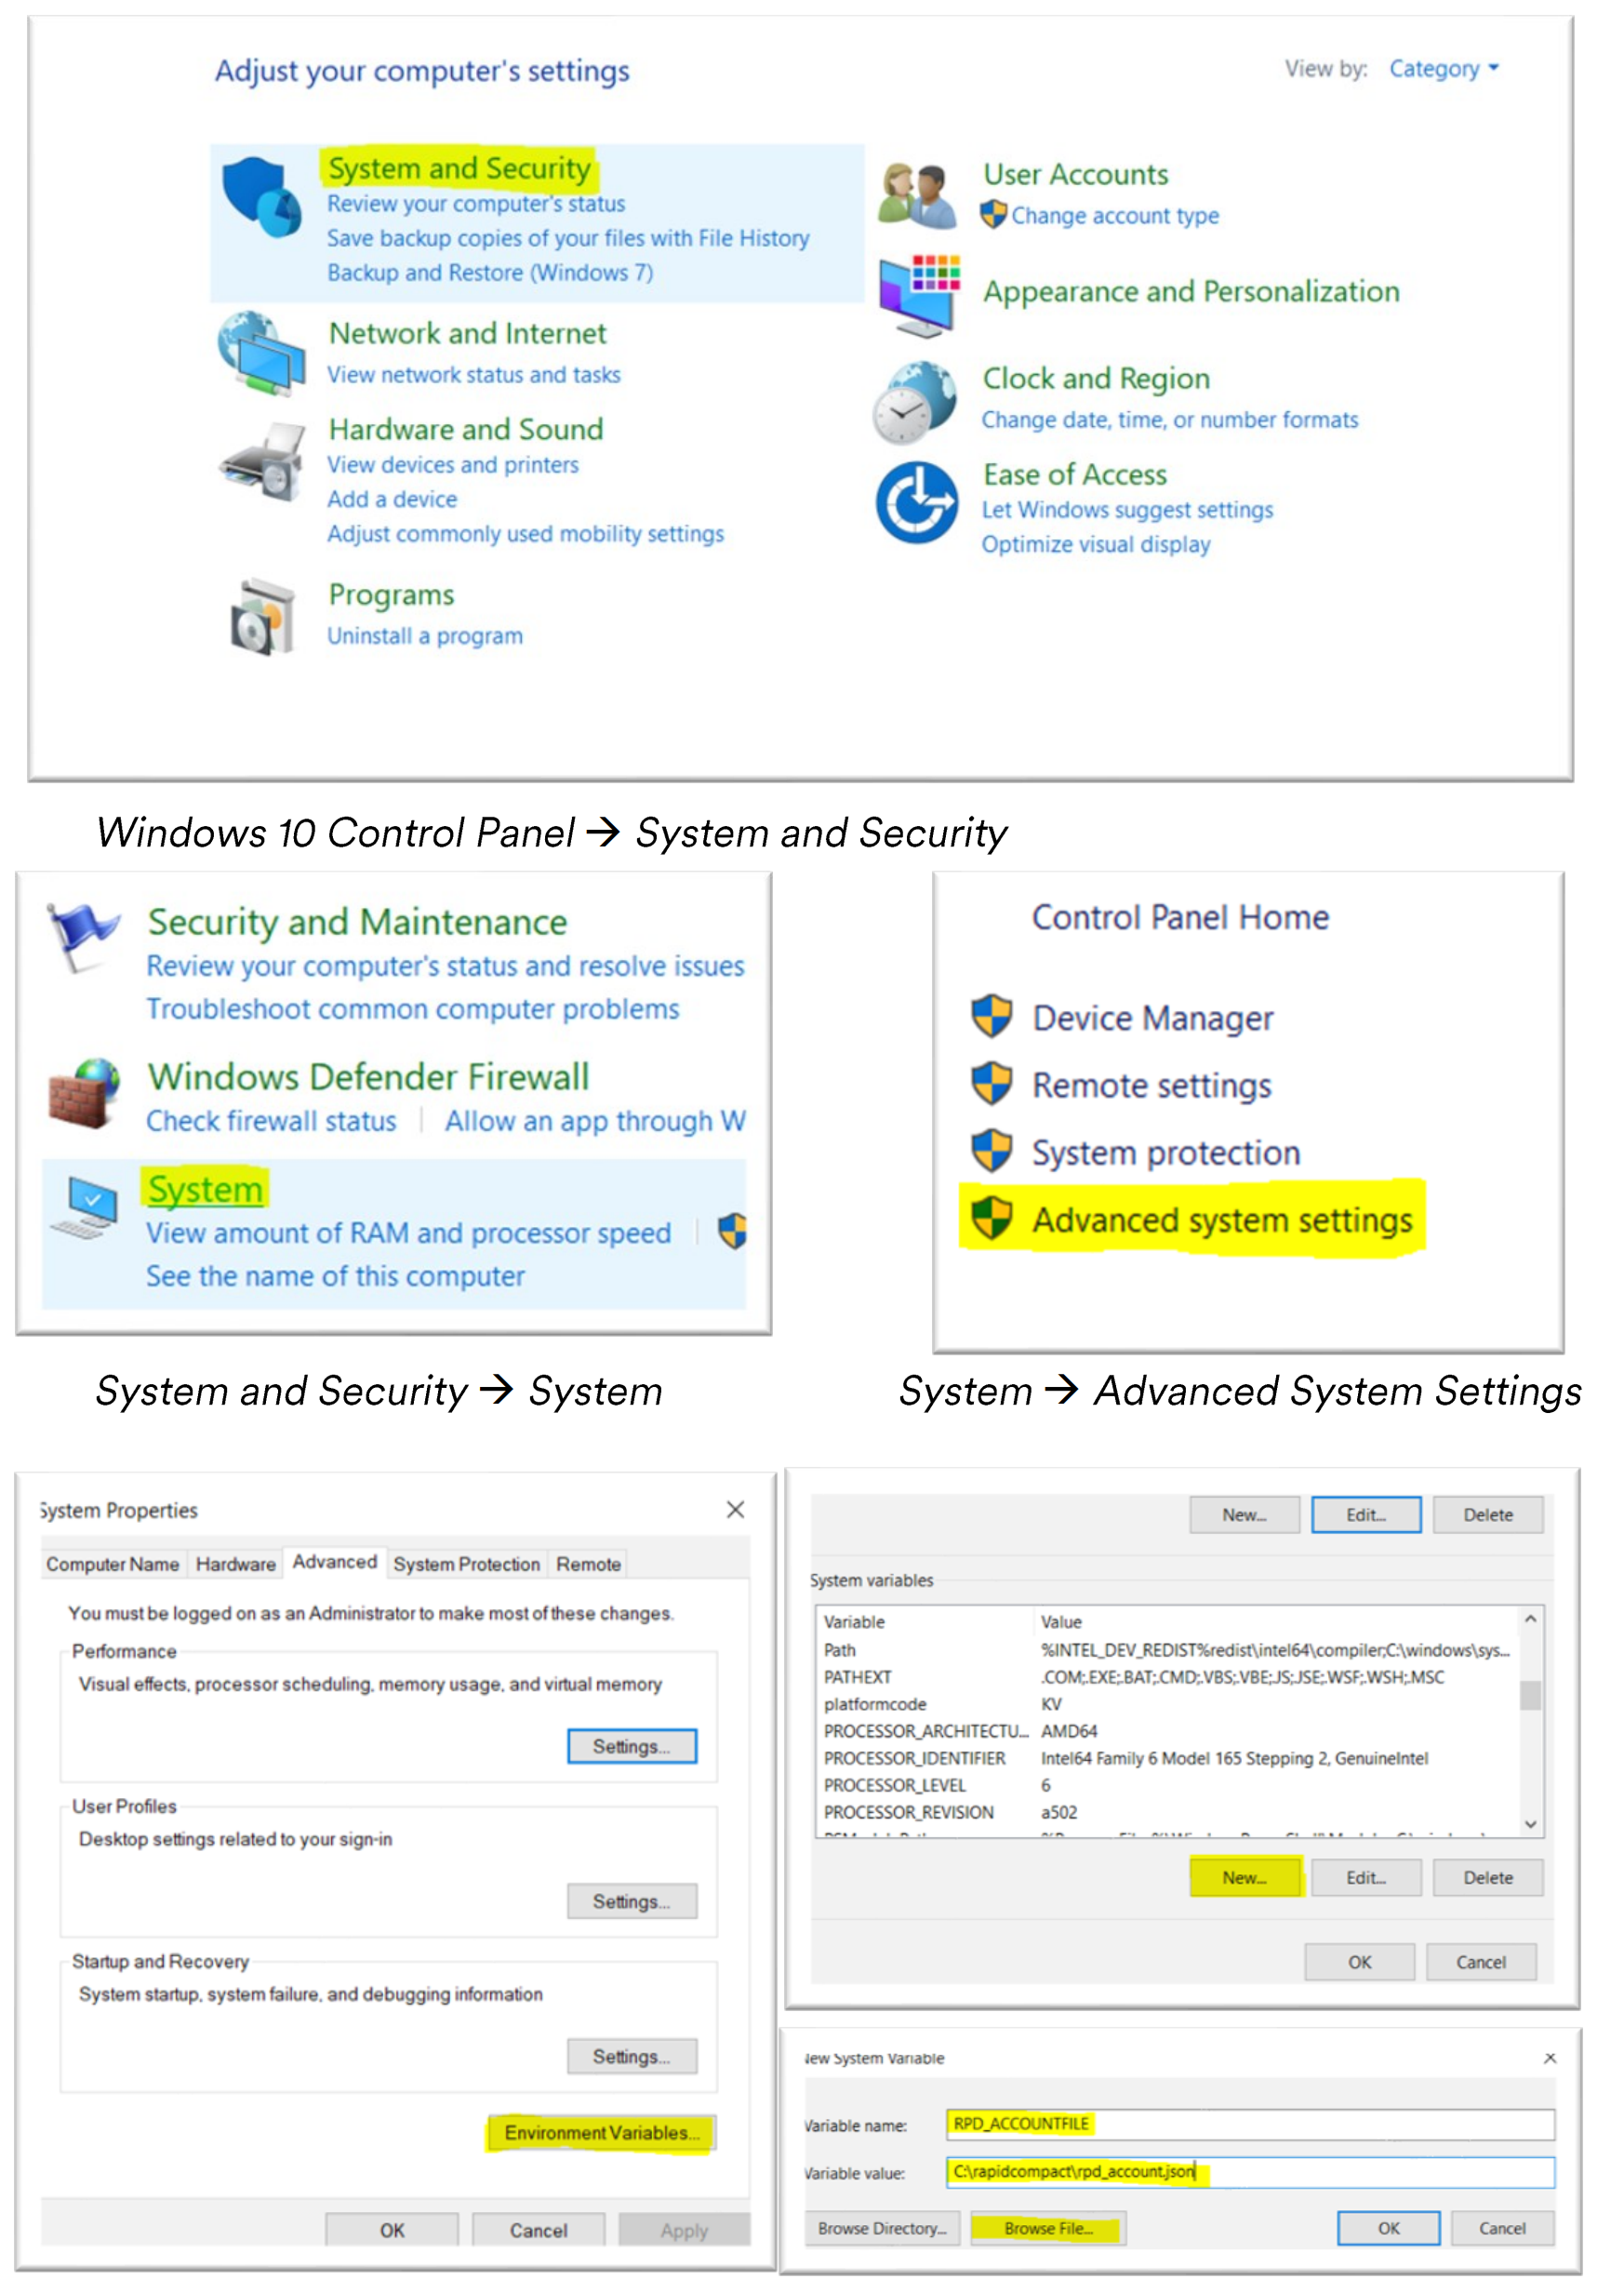
- Click on “New…” and name the environment variable “RPD_ACCOUNTFILE”, then you can either simply browse the rpd_account.json file or type in the exact path; In this example that is: “C:\3d-processor\rpd_account.json”. This is it. You are almost all set!
MacOS
First of all the MacOS 10.15 Catalina Update introduced a change from the Commandline Tool "bash" to "zsh@.
To know which shell is being used, type this command in the terminal:
echo "$SHELL"
To switch to “zsh” type in the following command:
chsh -s /bin/zsh
To switch to “bash” type in the following command:
chsh -s /bin/bash
Similar to the windows setup you will need to save the rpd_account.json file somewhere on your system.
Let's assume your file is under /Users/YOUR_USER_NAME/Documents/ rpd_account.json
(replace the username, you can check what is your username in the terminal using the command "whoami").
To configure the environment variable, you can use the terminal:
For Catalina, if using "zsh" enter this command in the terminal (make sure the command is in one single line):
echo 'export RPD_ACCOUNTFILE=/Users/YOUR_USER_NAME/Documents/rpd_account.json' >> ~/.zshenv
When using the "bash" shell, use this instead:
echo 'export RPD_ACCOUNTFILE=/Users/YOUR_USER_NAME/Documents/rpd_account.json' >> ~/.bash_profile
After this, when you open a new terminal, rpdx should find the file. You can confirm the variable is set using this command:
echo $RPD_ACCOUNTFILE
Linux
Again, similar to the windows setup you will need to save the rpd_account.json file somewhere on your system.
Let's assume your file is under /home/YOUR_USER_NAME/rpd_account.json
To configure the environment variable, use the following command:
export RPD_ACCOUNTFILE=/home/YOUR_USER_NAME/rpd_account.json
You can confirm the variable is set using this command:
echo $RPD_ACCOUNTFILE
Authentication Token Generation
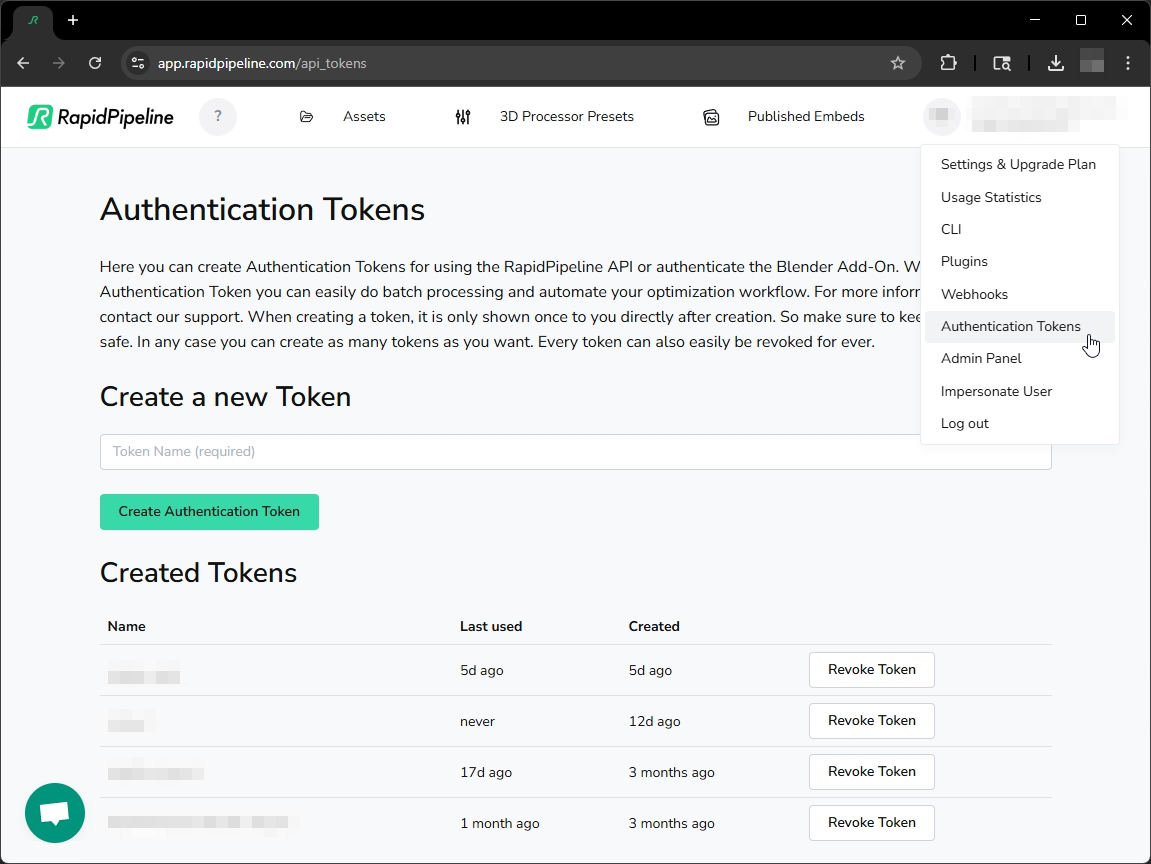
Log in on https://app.rapidpipeline.com and navigate to your account settings on the top right corner -> Authentication Tokens. Now name your token to your liking and hit “Create Authentication Token”:
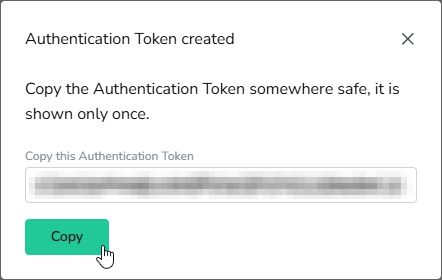
You can then copy the token string once (it won’t be accessible through the Web interface later, for security reasons) and then insert it into your account file, which you did set up before:
{
    "host" : "api.rapidpipeline.com",
    "token" : "YOUR AUTHENTICATION TOKEN HERE"
}
In order to track usage and receive data for technical support the CLI will share some information with DGG. HTTPS license authentication request uses end-to-end encryption.
Shared Data to the DGG License Server
- Your command line (commands and parameters)
- Your optimization settings
Data which is not shared with the DGG License Server
- Any 3D model data
- Any texture data
- Any statistics about your 3D model
- File names (obfuscated)
You should now be able to use the 3D Processor CLI by opening your systems’ command line and type “rpdx”.
If you are looking for commands and what configurable parameter settings the 3D Processor CLI has to offer, please visit our CLI Documentation.
Hardware Requirements
| Hardware | Recommendation | Description |
|---|---|---|
| Processor | x86-64 CPU, 8vCPUs recommended | rpdx makes use of multiple cores/threads for the following operations: UV unwrapping, texture baking, rendering |
| RAM | 1GB minimum, 16GB recommended | The amount of RAM required is highly dependent on the input models and operations performed. |
| Hard disk space | Ubuntu: 100MB, macOS: 85MB, Windows: 85MB | Executable and libraries only. |
| Graphics Card | Not used | rpdx can run headless, it has no dependencies on OS graphics APIs. rpdx does not support GPU acceleration. |
Memory Usage Estimation
Basic estimation
The following provides a conservative estimation on the amount of memory necessary to compact a 3D model using rpdx. In some cases, the estimate could be much higher than the actual number.
    inputMem = numInputTris * 36 + numInputVertices * 64 + numInputTexels * 3

    totalMem = 100MB + (inputMem + numOutputTexels * 3) *4
Note, that all of the values used in the calculation can be printed or written from any given input or output files using the following commands:
    rpdx -i foo.bar -p

    rpdx -i foo.bar --write_info
Precise estimation
This estimation should be more accurate but may in some cases be under the target. The number of vertices can be approximated as 0.75* numTriangles for many models.
    inputEstimationGeo = inTris * 3 * 3 * 4 + inVerts * (3 + 3 + 2) * 8

    # assuming tangents are needed (baking normalmaps)

    outputEstimationGeo = outTris * 3 * 4 * 4 + outVerts * (3 + 3 + 6 + 2) * 8

    estimation = (100 * 1024 * 1024) + (inputEstimationGeo + inTexels * 3) * 2 + (outputEstimationGeo + outTexels * 3) * 2
Download the latest CLI packages for win/macOS/Linux here: https://app.rapidpipeline.com/cli.
The RapidPipeline 3D Processor CLI requires an Enterprise or Custom Plan: https://rapidpipeline.com/en/pricing/.
Make sure to download only the CLI installers with version number 7.x.x and newer = 3D Processor. For version 6.x.x and older please refer to the Legacy Documentation.
Commands Guide
The RapidPipeline 3D Processor CLI utilizes commands in combination with configuration settings JSON files (= 3D Processor Presets) to steer the processing of 3D data.
RapidPipeline 3D Processor CLI v7 = rpdx
Get started with using the 3D Processor CLI in the 3D Processor CLI Tutorials here.
Configuration Settings
For an overview of available Settings please refer to the general 3D Processing Schema & Settings Documentation.
Launching the CLI
| Executable | Description |
|---|---|
| rpdx | Name of the 3D Processor Executable |
calling the executable:
rpdx
return:
=========================================================================f
                rpdx - The RapidPipeline 3D Processor CLI
                 v7.0.0 (5c23466, Aug  15 2024, 20:25:53)
=========================================================================
WARNING: Empty processing command pipeline. Not doing anything (use -h for help).
Available Commands
| Command | Argument | Description |
|---|---|---|
| -h [ --help ] | ⦸ | Lists all available parameters |
| -i [ --import ] | arg (directory/file) | Imports an asset from a file |
| -p [ --print_info ] | ⦸ | Prints information about the current 3D asset. This happens directly on file import |
| -r [ --run_processor ] | ⦸ | Main command to run 3D processing. Requires an input configuration file or --export command to have any effect (the latter only from CLI v7.2.0 on). |
| --read_c [ --read_config ] | arg(=config.json) | Reads and applies the given configuration file. Multiple Configuration files can be read within the same commandline operation and will be combined if possible |
| --write_c [ --write_config ] | arg(=config.json) | Writes current settings to the given configuration file |
| --write_m [ --write_metrics ] | arg(=rpd_metrics.json) | Writes metrics to a file. This happens after all other outputs are generated |
| --write_i [ --write_info ] | arg(=rpd_info.json) | Writes information about the current 3D asset to a JSON file. This happens directly on file import |
| --render | arg(=rpd_render_config.json) | Renders an image or turntable of the current asset. Render Settings are stored within the a respective rpd_rendering config |
| --system_config | arg(=rpd_system_config.json) | Reads and applies system configuration |
| --write_rp [ --write_rpdcache ] | arg (directory/file) | Writes rpdcache files. This happens directly on file import |
| -o [--output] | arg (directory) | Specifies directory name for file exports. The exported format(s) and settings can be configured in the Export Settings |
The --run_processor command is required for any 3D processing operation, including the --export command (from CLI v7.2.0 on). The following warnings might occure in different situations:
WARNING: --run_processor command is specified but no configuration setting or --export command found, doing nothing.
WARNING: No processing commands given. Add --run_processor command to apply settings and 3D file exports or --render to apply rendering settings and image file exports.
WARNING: --export is used without a processing command. Add --run_processor command to apply settings and 3D file exports
New Commands (since v7.2.0):
| Command | Argument | Description |
|---|---|---|
| -e [--export] | arg (directory) | Specifies directory and 3D format for a specific file export. If in addition Export Settings are defined within a JSON configuration file, the format(s) are ideally aligned between settings file and command line. If the export formats are not alligned, the formats specified with the --export command are auto-matched (per format) to the configuration and otherwise get written out with defaults. |
The --export command can not be used with CLI versions v7.0.0 - v7.1.1. It is only recognized from CLI v7.2.0 on.
Command Line Examples
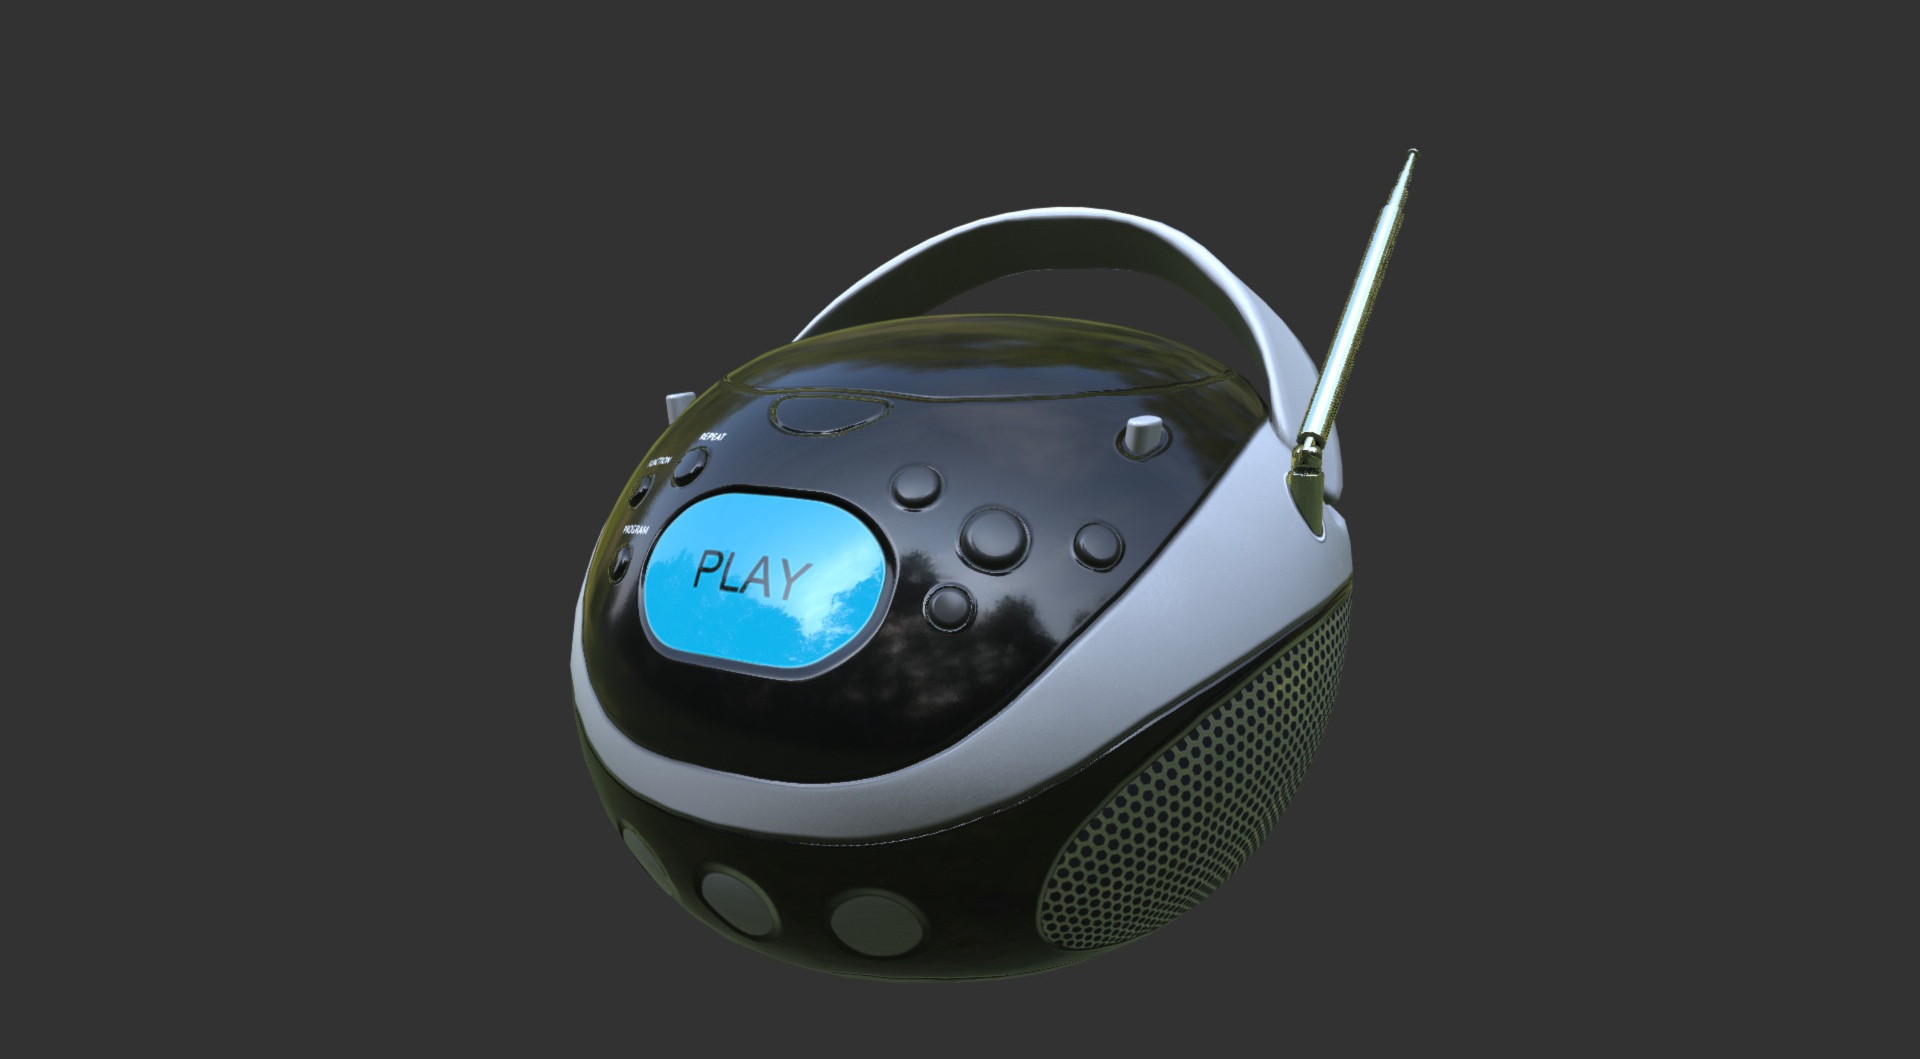
example file
- Model:
BoomBox.gltf - Source: https://github.com/KhronosGroup/glTF-Sample-Assets/blob/main/Models/BoomBox/glTF-Binary/BoomBox.glb
help
input:
rpdx -h
return:
=========================================================================
                rpdx - The RapidPipeline 3D Processor CLI
                 v7.0.0 (5c23466, Aug  15 2024, 20:25:53)
=========================================================================

Usage: C:\Program Files\RapidPipeline 3D Processor 7.0.0\rpdx.exe -i <input-file> {[command]}

Example: C:\Program Files\RapidPipeline 3D Processor 7.0.0\rpdx.exe -i highres-mesh.ply

To explore a more detailed documentation, visit https://docs.rapidpipeline.com/

_______________________General_______________________:
  -h [ --help ]                         lists all available parameters
  -i [ --import ] arg                   imports an asset from a file
  -p [ --print_info ]                   prints information about the current 3D
                                        asset
  --read_config arg                     reads and applies the given config file
  --system_config arg                   reads and applies the given system
                                        config file
  -o [ --output ] arg                   defines the output directory for
                                        exporting
  --write_config [=arg(=rpd_config.json)]
                                        writes current settings to the given
                                        config file
  --write_rpdcache [=arg(=input.rpdcache)]
                                        writes input to cache file
  --write_metrics [=arg(=rpd_metrics.json)]
                                        writes metrics to a file using this ID
  --write_info [=arg(=rpd_info.json)]   writes information about the current 3D
                                        asset to a JSON file
  -r [ --run_processor ]                process 3d asset

______________________Rendering______________________:
  --render arg          renders images according to a configuration file
import and print info
input:
rpdx -i BoomBox.glb -p
return:
=========================================================================
                rpdx - The RapidPipeline 3D Processor CLI
                 v7.0.0 (5c23466, Aug  15 2024, 20:25:53)
=========================================================================
Unlocked via RapidPipeline account.
Loading asset from file "BoomBox.glb".
//ASSET INFO BEGIN
{
  "bbMin":    [-0.00992115, -0.00977163, -0.0100762],
  "bbMax":    [0.00992115, 0.00977163, 0.0100762],
  "bbCenter": [0, 0, 0],
  "bbSize":   [0.0198423, 0.0195433, 0.0201525],
  "area3D":   0.00134651,
  "numVertices": 3133,
  "numVerticesSingleIndexed": 3575,
  "numTriangles": 6036,
  "numQuads": 0,
  "numMeshes": 1,
  "numSubMeshes": 1,
  "numDrawCalls": 1,
  "numMaterials": 1,
  "numNodes": 2,
  "numLights": 0,
  "hasRigidAnimations": false,
  "numRigidAnimations": 0,
  "hasSkinnedAnimations": false,
  "hasMorphTargets": false,
  "animations": [],
  "extensionsUsed": [],
  "extensionsUnsupported": [],
  "numTexels": 25165824,
  "hasUVs": true,
  "hasVertexColors": false,
  "hasVertexNormals": true,
  "hasVertexTangents": true,
  "hasVertexBitangents": true,
  "numOpaqueMaterials": 1,
  "numAlphaBlendMaterials": 0,
  "numAlphaMaskMaterials": 0,
  "hasBaseColorMap": true,
  "hasMetallicMap": true,
  "hasRoughnessMap": true,
  "hasEmissiveMap": true,
  "hasTSNormalMap": true,
  "hasOSNormalMap": false,
  "hasOcclusionMap": true,
  "hasDisplacmentMap": false,
  "hasClearcoatMap": false,
  "hasClearcoatColorMap": false,
  "hasClearcoatRoughnessMap": false,
  "hasClearcoatNormalMap": false,
  "hasTransmissionMap": false,
  "hasSheenColorMap": false,
  "hasSheenRoughnessMap": false,
  "hasSpecularColorMap": false,
  "hasSpecularValueMap": false,
  "hasThicknessMap": false,
  "hasIridescenceMap": false,
  "hasIridescenceThicknessMap": false,
  "numBaseColorMaps": 1,
  "numMetallicMaps": 1,
  "numRoughnessMaps": 1,
  "numEmissiveMaps": 1,
  "numTSNormalMaps": 1,
  "numOSNormalMaps": 0,
  "numOcclusionMaps": 1,
  "numDisplacmentMaps": 0,
  "numClearcoatMaps": 0,
  "numClearcoatColorMaps": 0,
  "numClearcoatRoughnessMaps": 0,
  "numClearcoatNormalMaps": 0,
  "numTransmissionMaps": 0,
  "numSheenColorMaps": 0,
  "numSheenRoughnessMaps": 0,
  "numSpecularColorMaps": 0,
  "numSpecularValueMaps": 0,
  "numThicknessMaps": 0,
  "numIridescenceMaps": 0,
  "numIridescenceThicknessMaps": 0,
  "maxResBaseColorMapUV0": 2048,
  "maxResMetallicMapUV0": 2048,
  "maxResRoughnessMapUV0": 2048,
  "maxResEmissiveMapUV0": 2048,
  "maxResTSNormalMapUV0": 2048,
  "maxResOcclusionMapUV0": 2048,
  "avgAngleDistortion": 0.0750853,
  "maxAngleDistortion": 0.952134,
  "displacementReferenceMin": 0,
  "displacementReferenceMax": 0
}
//ASSET INFO END
import and write info to file
input:
rpdx -i BoomBox.glb --write_i
return:
=========================================================================
                rpdx - The RapidPipeline 3D Processor CLI
                 v7.0.0 (5c23466, Aug  15 2024, 20:25:53)
=========================================================================
Unlocked via RapidPipeline account.
Loading asset from file "BoomBox.glb".
Writing info to default file name rpd_info.json
writing a configuration file
input:
rpdx --write_config
return:
=========================================================================
                rpdx - The RapidPipeline 3D Processor CLI
                 v7.0.0 (1012ed0, Aug 29 2024, 10:31:55)
=========================================================================
Writing config to file "rpd_config.json".
The default config written out by the 3D Processor CLI will write out a single file in the gltf format. Learn more about export settings and formats here: https://docs.rapidpipeline.com/docs/componentDocs/3dProcessingSchemaSettings/processor-schema-settings-v1.1#3d-processing-settings#format
reading a configuration file and running a 3d process
input:
rpdx --read_config example_default_config.json -i BoomBox.glb -r
The 3D Processor CLI requires a configuration settings JSON file in order to perform a 3D process. Exception --export command, see section below.
return:
=========================================================================
                rpdx - The RapidPipeline 3D Processor CLI
                 v7.0.0 (1012ed0, Aug 29 2024, 10:31:55)
=========================================================================
Validated configuration file.
Unlocked via RapidPipeline account.
Loading asset from file "BoomBox.glb".
Skipping optimize
Saving asset to file "output\0_gltf\BoomBox.gltf".
Directory "output\0_gltf" does not exist, will be created.
As you can see by default a directory named "output" will be created containing sub-directories named after the respective chosen output format in addition to a numerical prefix.
The Optimization process was not set in the example configuration file and thus was skipped. Learn more about Optimization settings here
export a 3D file
Exporting a 3D file with the RapidPipeline 3D Processor is done via a separate export section within the configuration settings JSON file. Read more about the export object and settings here.
Since CLI v7.2.0 there is an alternative --export command which can be used to specify a specfic 3D format and output path, while it simulates an export object with default settings for the respective specified 3D format.
export via configuration settings file
input:
command:
rpdx --read_config example_export_config.json -i BoomBox.glb -r
settings file:
{
    "export": [
        {
            "discard": {
                "unusedUVs": false
            },
            "fileName": "",
            "format": {
                "gltf": {
                    "excludeTangents": true,
                    "geometryCompression": "draco"
                }
            },
            "preserveTextureFilenames": false,
            "reencodeTextures": "auto",
            "textureMapFilePrefix": ""
        },
      {
      "discard": {
        "unusedUVs": false
      },
      "fileName": "",
      "format": {
        "fbx": {
          "3dsMaxPhysicalMaterial": {},
          "units": "m",
          "unitConversion": true,
          "axisSystem": "original",
          "excludeTangents": true,
          "flipNormalmapY": false,
          "preferBinaryFormat": true
        }
      },
      "preserveTextureFilenames": false,
      "reencodeTextures": "auto",
      "textureMapFilePrefix": ""
    }
    ]
}
To apply a 3D processing configuration, the 3D Processor CLI requires the --run_processor command (short: -r).
return:
=========================================================================
                rpdx - The RapidPipeline 3D Processor CLI
                 v7.2.0 (ddc2b14, Feb 20 2025, 15:22:31)
=========================================================================
Validated configuration file.
Unlocked via RapidPipeline account.
Loading asset from file "BoomBox.glb".
Skipping optimize
Saving asset to file "output\0_gltf\BoomBox.gltf".
Directory output\0_gltf does not exist, will be created.
Saving asset to file "output\1_fbx\BoomBox.fbx".
Directory output\1_fbx does not exist, will be created.
FBX SDK Version: 7.7.0
FBX binary file version FBX201900
As you can see by default the 3d formats specified within the configuration file's export section are getting written out in a standardized way:
- an
outputfolder is created (this can be customized with the-ocommand, more about this command here - the formats are written out within format specific subfolders (e.g.
0_gltf), and are indexed according to their order, e.g.gltfas0_gltfas it is the first format specified in the configuration file
export via command
input:
rpdx -i BoomBox.glb -e BoomBox_output.glb -r
In order to export a 3D file, the 3D Processor CLI requires the --run_processor command (short from: -r). The export command requires CLI v 7.2.0 or newer.
return:
=========================================================================
                rpdx - The RapidPipeline 3D Processor CLI
                 v7.2.0 (f4697d5, Feb 12 2025, 18:52:58)
=========================================================================
Unlocked via RapidPipeline account.
Loading asset from file "BoomBox.glb".
Skipping optimize
Saving asset to file "BoomBox_output.glb".
As you can see the return is similar to the export via configuration settings file above, only the validation of the configuration file is missing, as the --export command automatically triggered an implicit export section with glb format.
The --export command also supports an output file path.
example:
rpdx -i BoomBox.glb -e output/BoomBox.glb -r
export via combined settings and command
input :
rpdx -i BoomBox.glb --read_config example_export_config.json -e gltf/BoomBox_output.gltf -e usdz/Boombox_output.usdz -r
If both a configuration settings file and the --export commands are given, the export formats are automatically matched between the specified settings formats and the ones in the commandline. If multiple of the same formats ares specified in a configuration file, the first export slot of the given format type get matched with the first occurance of the format in the command and so on.
Any unmatched formats from the command line are written out with default settings for the respective formats. Any unmatched formats from the settings file are written out with the default output directory and format specific sub-directories as seen above.
return:
=========================================================================
                rpdx - The RapidPipeline 3D Processor CLI
                 v7.2.0 (ddc2b14, Feb 20 2025, 15:22:31)
=========================================================================
Validated configuration file.
Unlocked via RapidPipeline account.
Loading asset from file "BoomBox.glb".
Skipping optimize
Saving asset to file "gltf/BoomBox_output.gltf".
Directory gltf does not exist, will be created.
Saving asset to file "output\0_fbx\BoomBox.fbx".
Directory output\0_fbx does not exist, will be created.
FBX SDK Version: 7.7.0
FBX binary file version FBX201900
Saving asset to file "usdz/Boombox_output.usdz".
Directory usdz does not exist, will be created.
As you can see the gltf format was specified in the configurations settings file as well as the command and therefore got matched.
The fbx was not specified in the command and thus was written out in the default path (output/0_fbx/).
Finally the usdz file was only specified via the command and therefore is written out with default settings as well but within the path and name specified with the --export command.
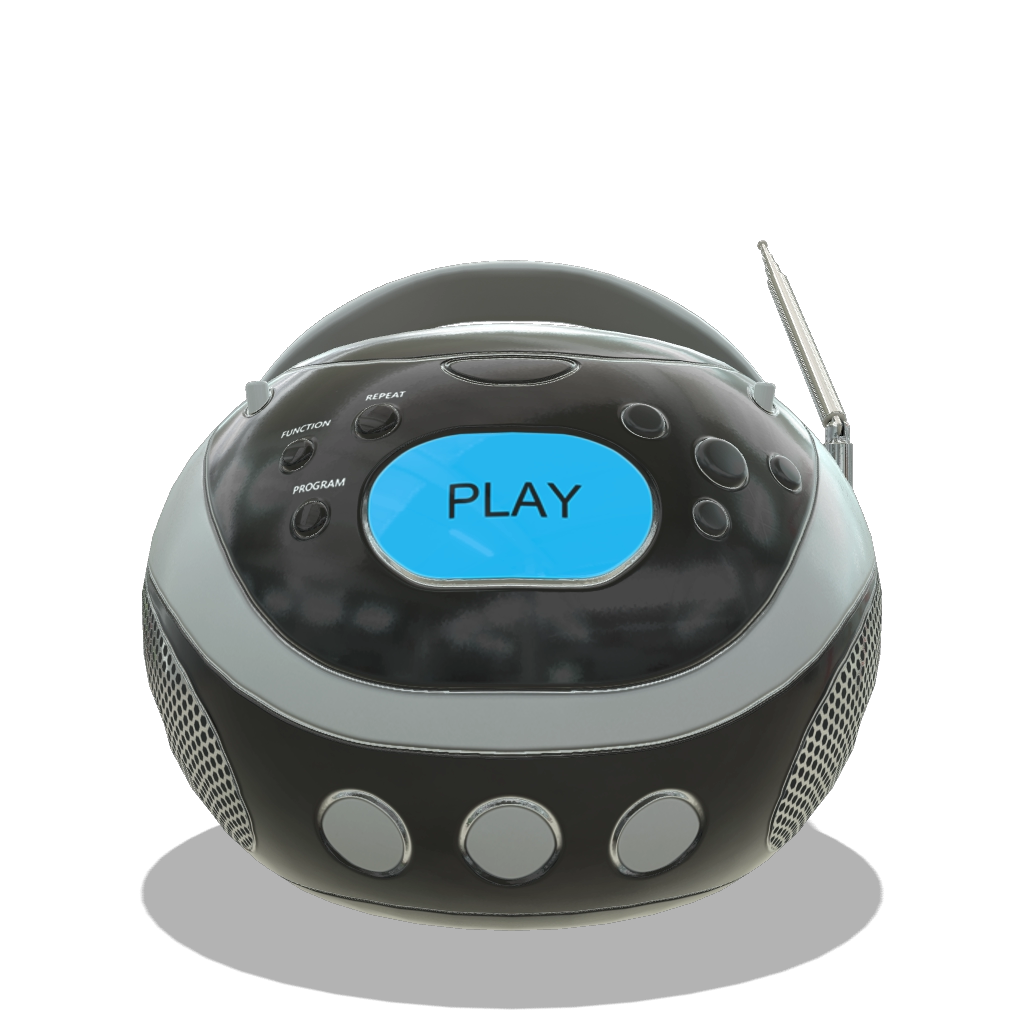
rendering an image
input:
rpdx -i BoomBox.glb --render
return:
=========================================================================
                rpdx - The RapidPipeline 3D Processor CLI
                 v7.0.0 (1012ed0, Aug 29 2024, 10:31:55)
=========================================================================
Unlocked via RapidPipeline account.
Loading asset from file ".\BoomBox.glb".
Rendering image to file "output/renderings".
100% [xxxxxxxxxxxxxxxxxxxxxxxxxxxxxxxxxxxxxxxx]
Done.
output image:
reading and applying rendering settings
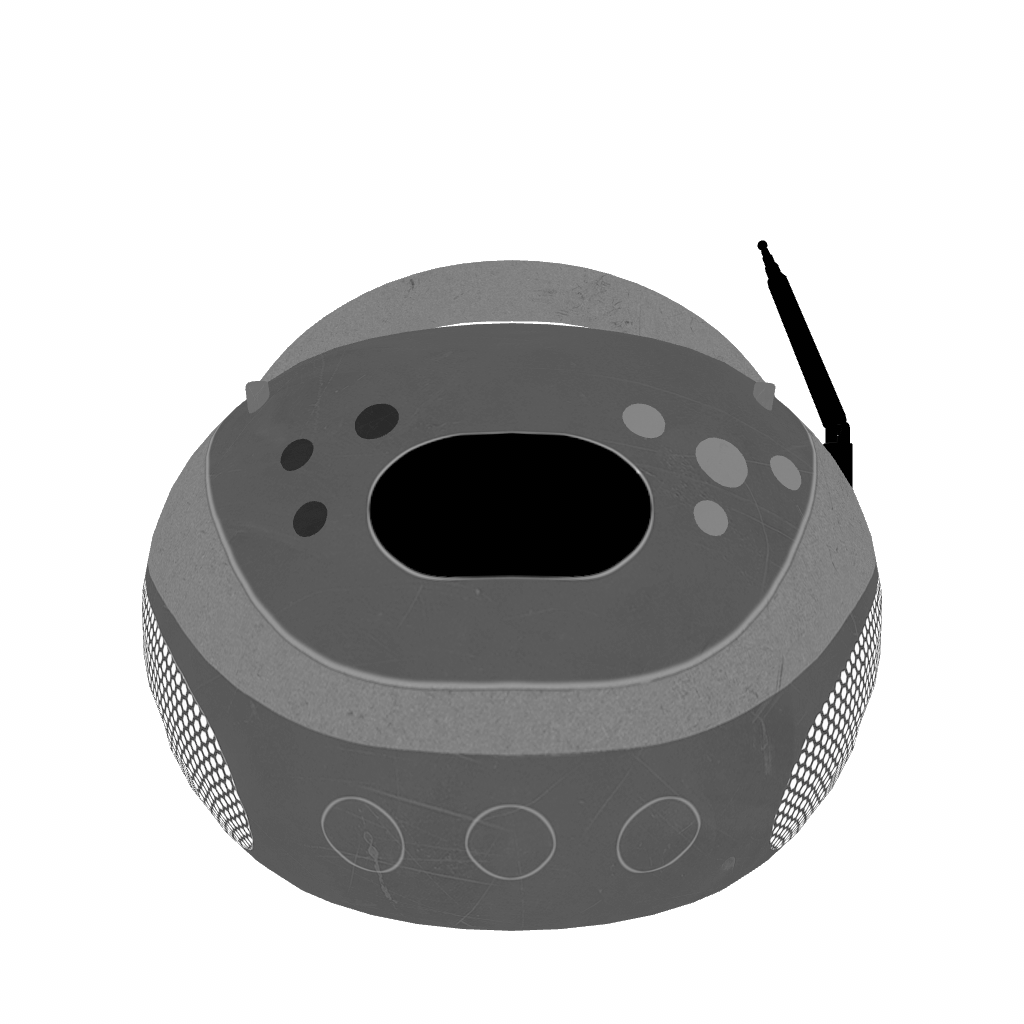
example single image render config
This example render configuration differs from the default render settings in exactly one setting category:
intead of
[...]
"shadingMode": "pbr",
[...]
we are using
[...]
"shadingMode": "roughness",
[...]
Check out all the available rendering settings here.
input:
rpdx -i BoomBox.glb --render render-image_config.json
return:
=========================================================================
                rpdx - The RapidPipeline 3D Processor CLI
                 v7.0.0 (1012ed0, Aug 29 2024, 10:31:55)
=========================================================================
Unlocked via RapidPipeline account.
Loading asset from file ".\BoomBox.glb".
Reading renderer configuration file '.\render-image_config.json'.
Validated configuration file.
Rendering image to file "output/renderings".
100% [xxxxxxxxxxxxxxxxxxxxxxxxxxxxxxxxxxxxxxxx]
Done.
output image:
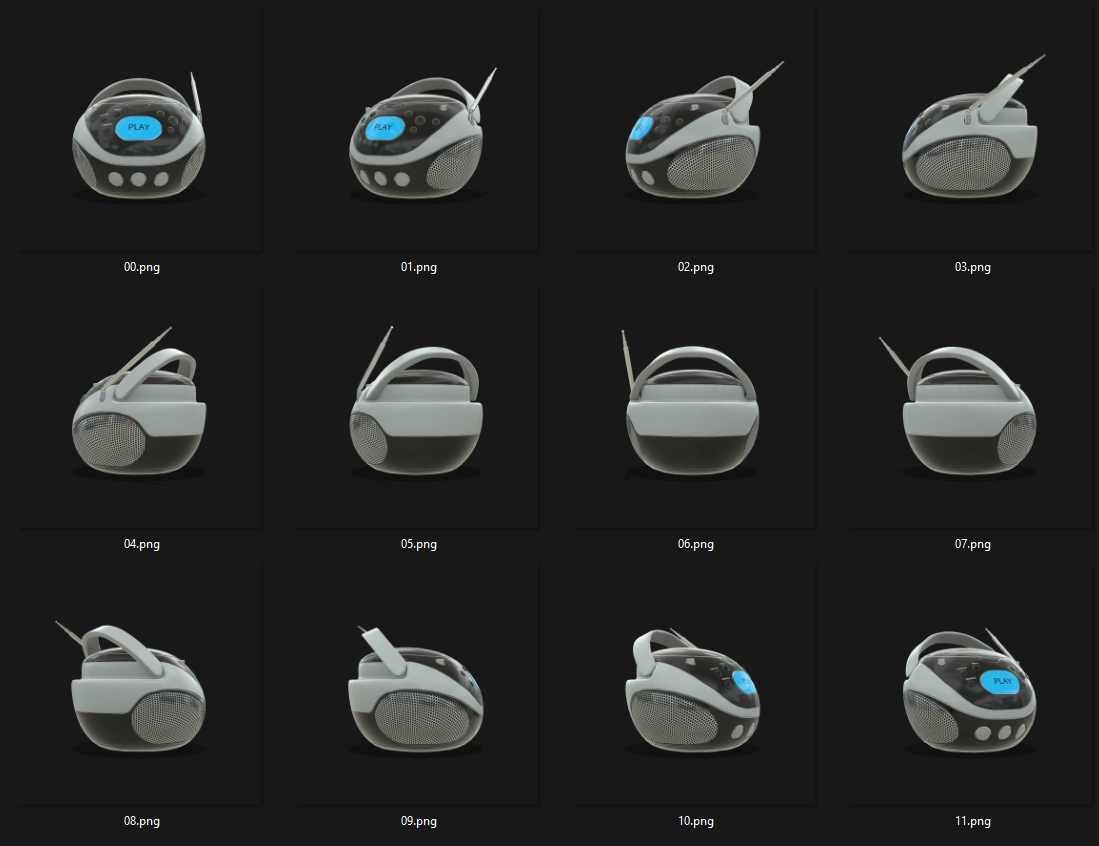
rendering a turntable view
example turntable render config
input:
rpdx -i BoomBox.glb --render render-turntable_config.json
return:
=========================================================================
                rpdx - The RapidPipeline 3D Processor CLI
                 v7.0.0 (1012ed0, Aug 29 2024, 10:31:55)
=========================================================================
Unlocked via RapidPipeline account.
Loading asset from file ".\BoomBox.glb".
Reading renderer configuration file '.\render-turntable_config.json'.
Validated configuration file.
Rendering image series to directory "output/renderings".
100% [xxxxxxxxxxxxxxxxxxxxxxxxxxxxxxxxxxxxxxxx]
Done.
output image series:
Batch Processing
The 3D Processor CLI can be easily called within a larger environment such as a wrapper script. To get started please see a simplistic python based CLI wrapper script here