RapidPipeline for Blender
Overview
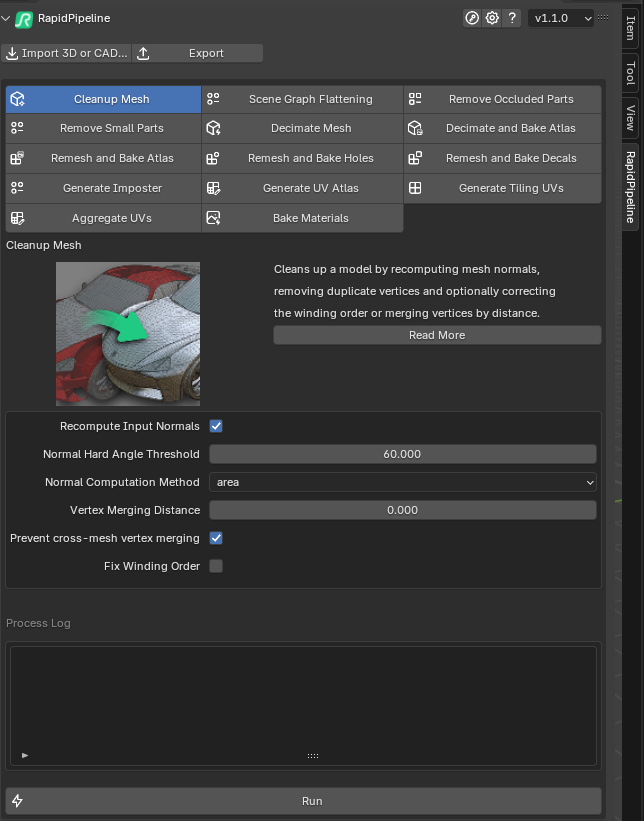
The RapidPipeline Blender Integration Add-On enables you to use RapidPipeline Actions and Expert 3D Processor Features directly within the Blender UI as an Add-On.
Process, optimize & simplify selected 3D models interactively and 100% locally.
System Requirements
- Blender Version: 4.0 or later. If you need to install for an earlier version please contact support@dgg3d.com
- Operating System: Windows 10/11 (64-bit), MacOS, or Linux
- Memory: 8GB RAM minimum, 16GB recommended
- Storage: 1GB free space for plugin installation
- Internet Connection: Required for plugin license authentication only
Installation
How to install the RapidPipeline Blender Integration Add-On.
- Uninstall earlier versions of the Add-On before installing a new version.
1. Get a RapidPipeline Account with Integrations
Start your 14-day free trial or subscribe to a Desktop plan.
If a RapidPipeline subscription is already attached to the account, and if the plan includes API access, then RapidPipeline Integrations are available for use.
2. Download the package
Sign in the RapidPipeline Web Platform.
Scroll down to see the Integrations, and download the latest installer for your application.
If you need a different installer version, click on
More Downloads.
The Integrations Download page offers all current available RapidPipeline Integration packages for download.
Please note the specific naming of the packages for different operating systems (e.g. macOS) and the different tags of the installer packages depending on additional functionalities (e.g. CAD Edition). Some packages such as CAD Edition might require a specific subscription tier or addon package. Learn more on the RapidPipeline Pricing Overview Page.
If you are an end-user of the plugins and do not have your own account, or you are an account manager and want to distribute the plugin packages to users, please refer to our Public Integrations Downloads page. Note that a valid Token from a RapidPipeline account is still required to activate the given integration and generate a seat.
3. Install the Add-On
Go to
Edit->Preferences->Add-ons->Install from disk.
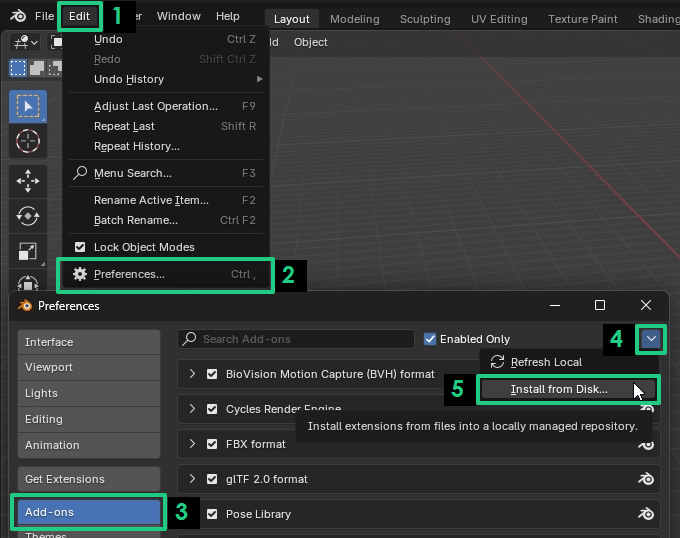
Browse and select the (.zip) file of the Add-On you downloaded, then click on
Install from Disk.Once the install has completed successfully
RapidPipeline_for_Blenderwill appear in the list. For more information on installing add-ons, see the Blender 4.2 manual.
4. Enter the RapidPipeline Authentication Token
Watch the video above, or for step-by-step instructions see Integrations Seat Management to learn how to generate and install an Authentication Token.
5. Learn How to Use RapidPipeline
For step-by-step guides see the RapidPipeline for Blender Integration Tutorials.
For detailed reference documentation see the Actions Documentation.
Congratulations! The RapidPipeline Blender Integration Add-On is now ready to be used.
Upgrading the Add-On
To upgrade to a new version of the Add-On, we recommend uninstalling the old Add-On first.
Go to
Edit->Preferences->Get Extensions->Uninstall.
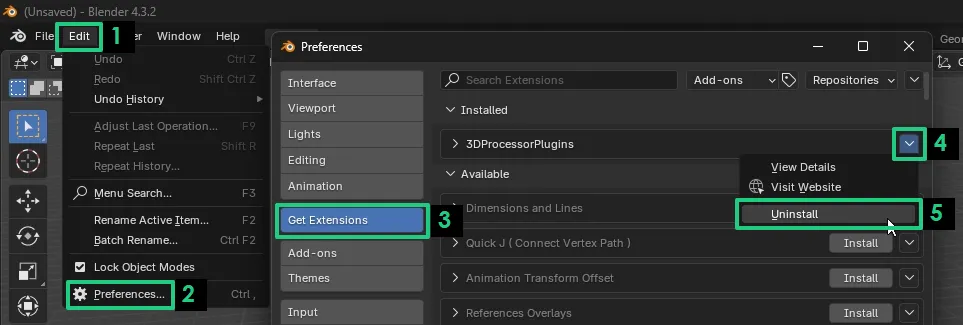
Then, download and install the new version.
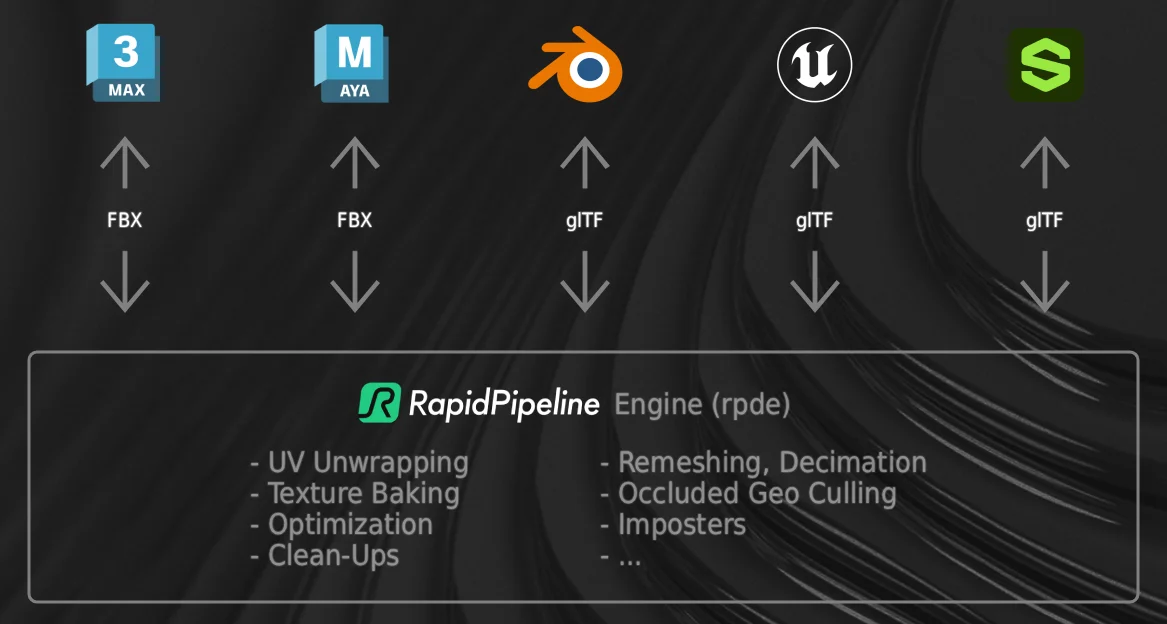
Internal Data Exchange
All our integrations leverage the RapidPipeline 3D Processor as an external engine to perform 3D data processing, behind the scenes.
The 3D data is sent to/from the application by leveraging each application's most compatible file format.
Known limitations
- The Add-On is only supported in Blender versions 4.0 and later.
- The Linux version of Blender offered via the Snap Store is not supported, please choose the upper version.

- Blender modifiers need to be manually applied before using the Add-On.
- Some materials are not supported:
- The Add-On exchanges data with Blender via glTF format.
- Supported are Pricipled BSDF node, image Textures, color Attributes, etc.
- All procedural materials within Blender are currently unsupported.
- The import of CAD formats and the use of CAD Import Settings are only supported if a CAD Plan has been added to the account.
- UI element scaling may have issues, especially in higher DPI monitors.
- Each seat of the Blender Add-On allows unlimited usage on one machine. Check your plan for the number of seats available.
Contact Us
Let us know how it's going, we would like to get your quick feedback here!